The Command Palette is part of the Site Editor and Post Editor and offers you a way to quickly navigate the content of your site and to invoke different actions such as:
- Search for individual posts or pages and create new ones.
- Search through templates, template parts and patterns.
- Add custom CSS.
- Access Styles and style revisions.
- Transform and manipulate blocks.
- Toggle settings and preferences.
- Reset customisations.
How to access the Command Palette
To access the Command Palette, head to the Site Editor and click on the title, at the top center of the editor. Once the command line opens, you can start typing to search for the action or content you want.
You will also find it available when in the Site View in the sidebar by clicking on the search icon.
You can also use the keyboard shortcut Cmd+k on Mac or Ctrl+k on Windows. Please note that the keyboard shortcut is not available in some environments at the moment.
List of available commands
Here’s a list of all available commands:
- Edit Template when editing a page.
- Back to page to return to editing a page from a template.
- Reset template
- Reset template part
- Reset styles to default
- Delete template
- Delete template part
- Toggle settings sidebar
- Toggle block inspector
- Toggle spotlight mode
- Toggle distraction free
- Toggle top toolbar
- Open code editor
- Exit code editor
- Toggle list view
- Toggle fullscreen mode
- Editor preferences
- Keyboard shortcuts
- Show/Hide block breadcrumbs
- Customize CSS
- Style revisions
- Open styles
- Learn about styles to trigger the welcome guide for Styles
- Reset styles
- View site
- View templates
- View template parts
- Open Navigation Menus
- Rename Pattern
- Duplicate Pattern
- Manage all custom patterns
An up-to-date list of all the available commands can be found here.
Demo
Please watch the demo below for more details.
Registering custom commands
It is possible to extend the Command Palette by registering your own commands. You can read more details on how to register your own commands here.
Changelog
- Updated 2023-11-27
- Changed wording to refer to Site and Post Editor
- Updated list of Commands
- Updated 2023-08-24
- Updated headings formatting
- Added category and subcategory
- Created 2023-08-08
You can view, manage, and modify your menus without having to find them in a specific template in the site editor. If your site has several menus, they will all be listed together and you will be able to edit them from there.
You can learn about the Site Editor in this support article: Site Editor.
The Site Editor navigation is only available when you install and activate a Block theme on your site.
You can do the follow actions using the Site Editor Navigation:
Access all your menus
When you navigate to Appearance > Editor > Navigation, you will see all your menus listed there.
Rename, duplicate, and delete menus
Once you select an individual menu, you will be able to rename, duplicate or delete it by clicking the Actions button next to its name.

Opening a page
Reorder, delete, and opening menu items
You can reorder and delete menu items from the Site Editor navigation sidebar by clicking on the Options for page link button next to each menu item.

You can also reorder items by dragging and dropping items, and even create submenus.
You can open any page from the Site Editor navigation section by clicking the Options for page link button and select Go to page. See the demostration video below.
Focus mode and advanced editing
The Site Editor navigation sidebar only allows you to do basic changes to individual menu items. If you need to edit menu item details, you can click on the menu itself (on the right) or on the Edit button (depicted by a pencil icon in the sidebar) to enter Focus Mode and access all menu settings.
Saving your changes
Please note that you will need to save your changes. You will be asked to save these changes before you exit the Site Editor but you can also save them manually at any point.
You can also save them by clicking cmd+s in Mac or ctrl+s in Windows.
Changelog
- Updated 2023-11-11
- Updating capitalisations.
- Updated 2023-08-24
- Updated formatting
- Changed the category to Site Editor
- Created 2023-08-08
The Site Editor Pages menu is only available when you install and activate a Block theme on your site. You can learn about the Site Editor in this support article: Site Editor.
In Site Editor Pages, you can edit both the page content and the template. The template is locked until you enable the template editing option.
Here you will also find the page details like information about the page status (for example, if a page is a draft or published) when the page was last updated, the number of words on the page, and how long it will take to read.
How to access Site Editor Pages
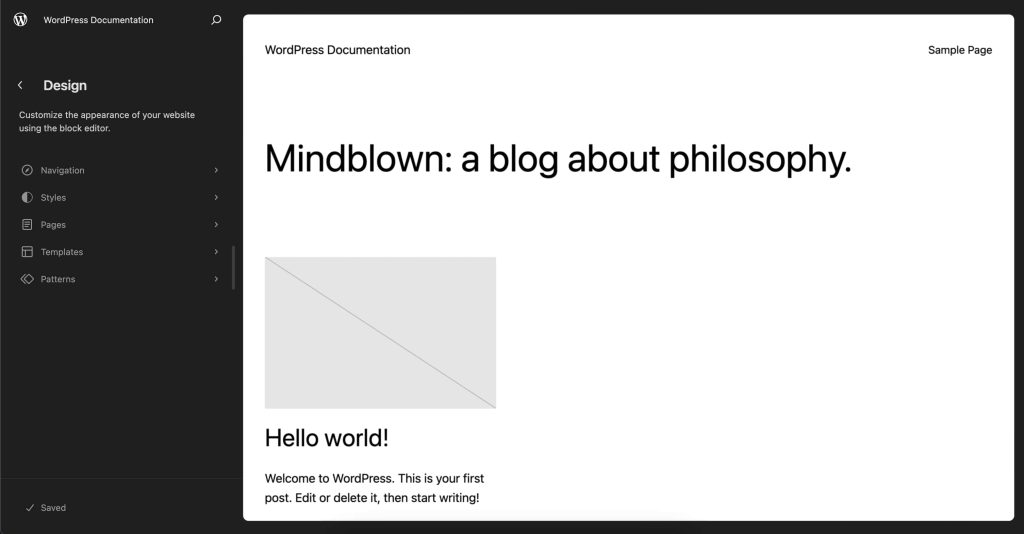
Once you install and activate a Block theme on your site, go to Appearance > Editor to open the Site Editor. In the sidebar menu, select Pages:
Sidebar features
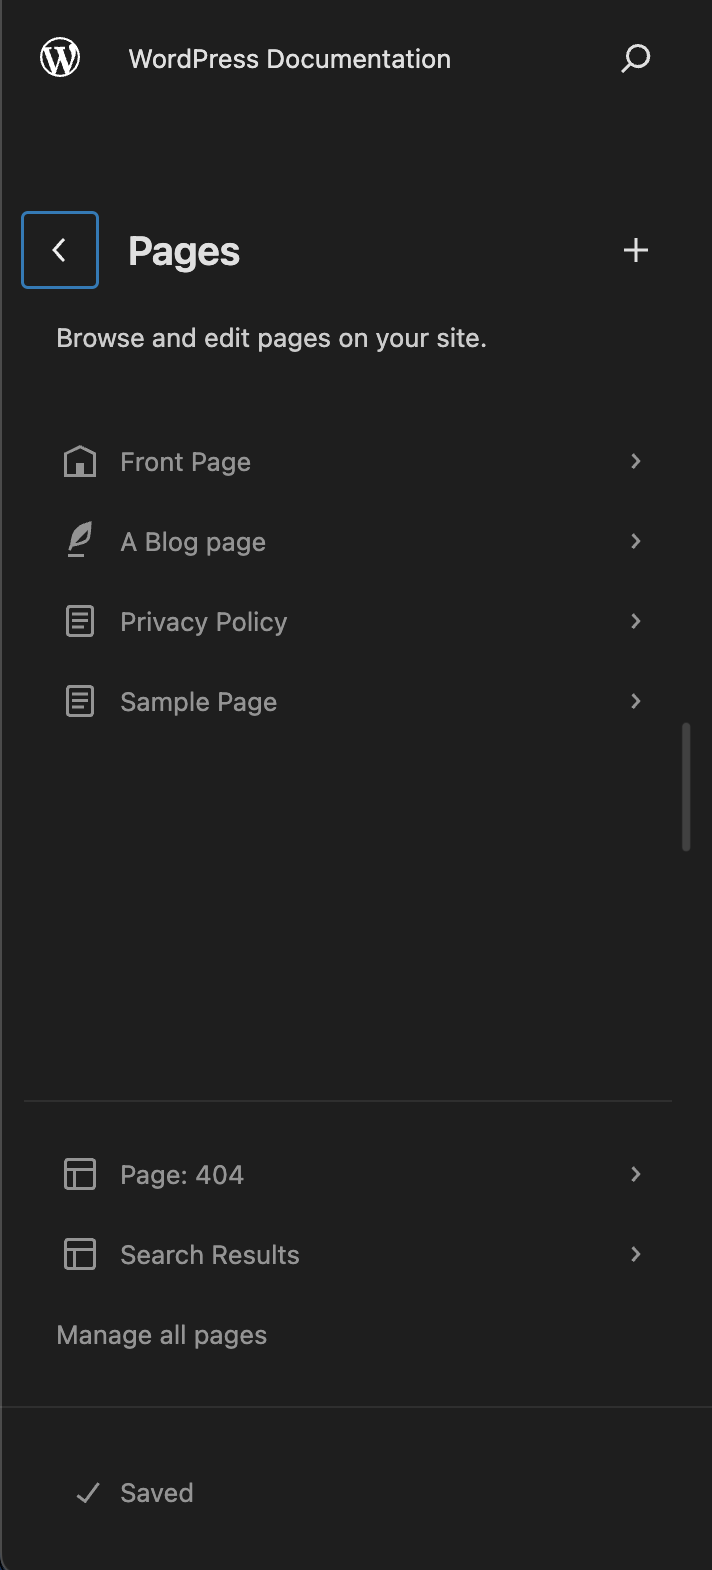
When you select Pages, WordPress shows a sidebar with a list of pages, page-related shortcuts, and an option to create new pages.
You will find your site icon or the WordPress logo at the top of the sidebar. Clicking on this image takes you back to the WordPress dashboard.
Next is your site title and a button that opens the Command Palette. You will recognize the Command Palette button by the icon of the magnifying glass. You can select the back button if you want to go back to the main Site Editor menu.
Page list
The page list includes all pages on your site that are either published or drafts. Each page in the page list is represented by an icon. Your front page uses an icon of a house. And if your site shows blog posts on a separate page, the blog page uses an icon of a feather pen.
Clicking on the page title opens the page and the page details sidebar.
Shortcuts
At the bottom of the sidebar are links that help you edit your site faster: Links to the 404-page template, the Search Results template, and Manage all pages, which takes you to the Pages screen in the WordPress admin.
Save status
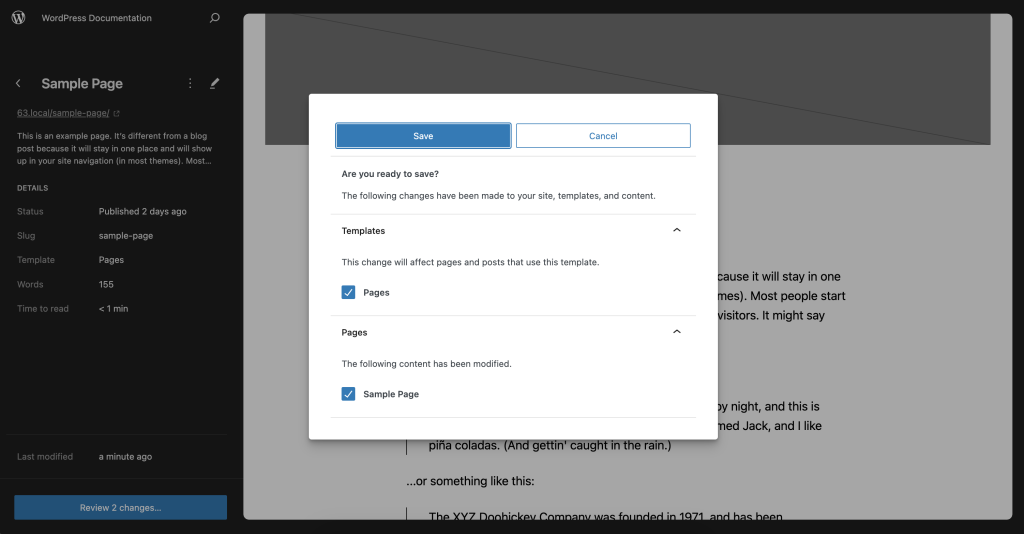
If you have unsaved changes to the page or the template, the save button at the bottom of the sidebar will be activated and highlighted with a blue background.
If there are unsaved changes to both the template and the page, you can review the changes before you save. Clicking the button opens a save modal where you can select if you want to save all changes:
The page details sidebar
This sidebar displays the name of the chosen page, a preview link for the front of the website, the featured image (if one exists), and a description.
Page details:
- Status – Draft or publishing date
- Slug
- Template – The name of the template that the page uses
- Words – The number of words in the content
- Time to read
- Last modified
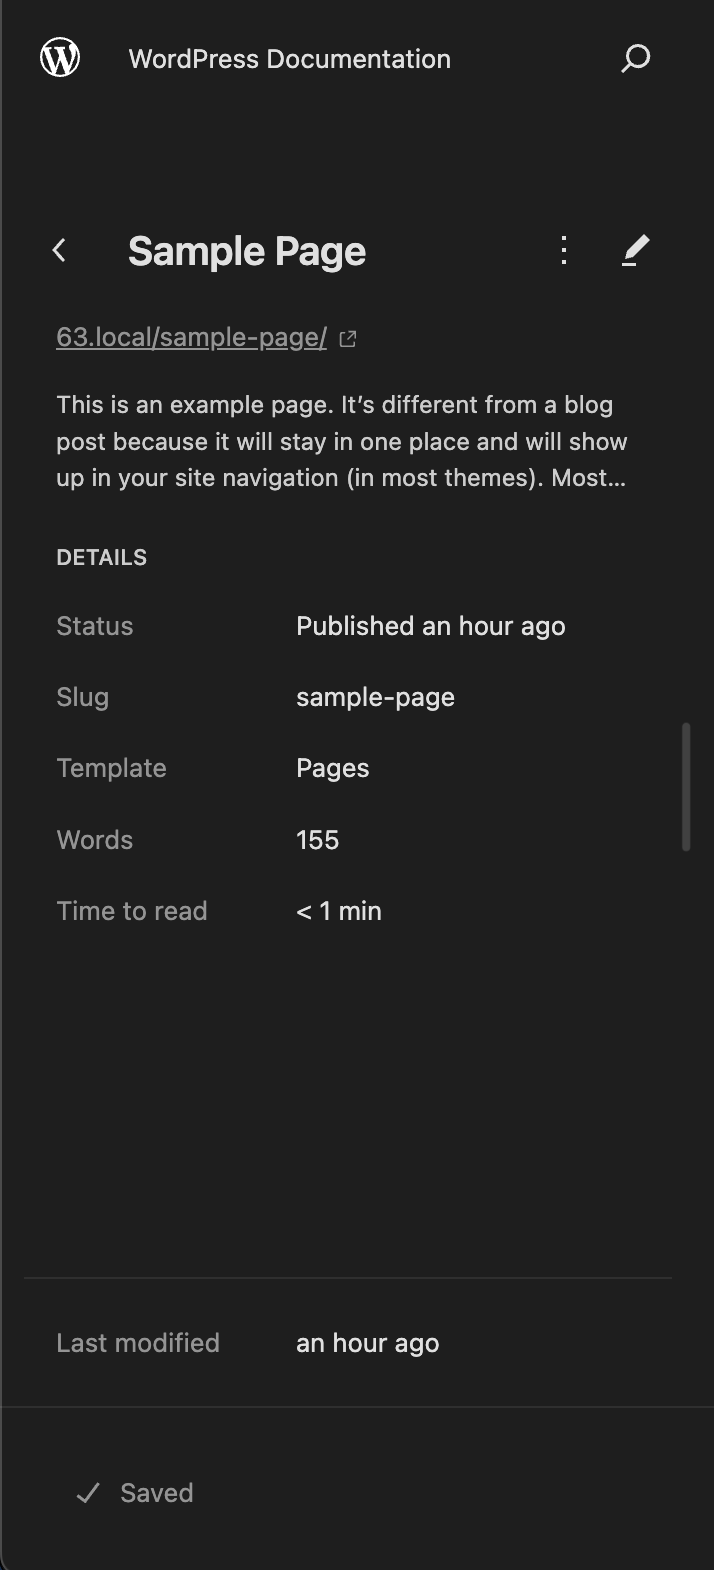
The ellipsis menu next to the page title opens a modal where you can trash the page:
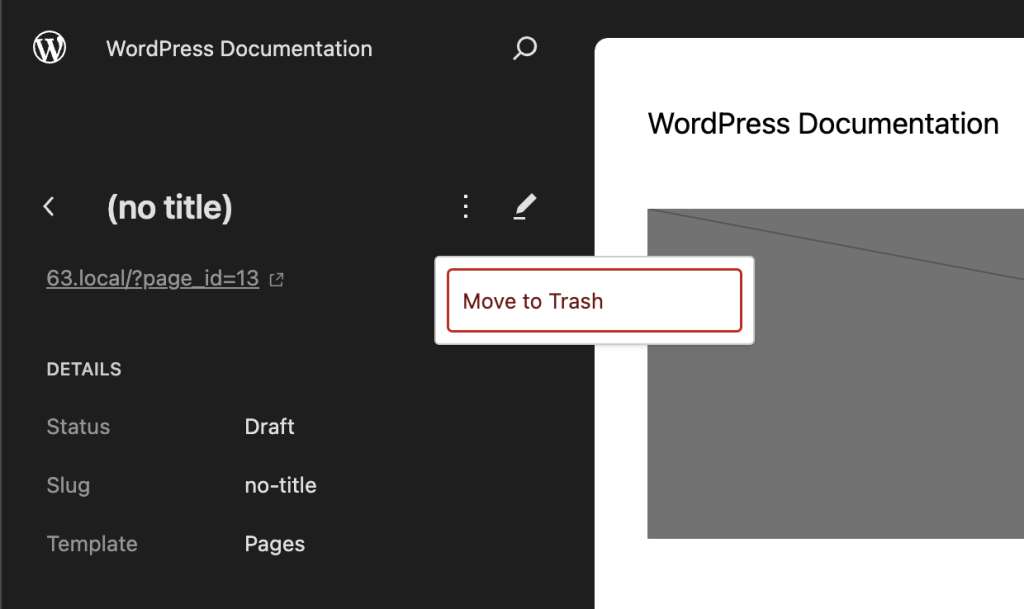
The pen icon represents editing: it redirects you to where you can edit the page in the Site Editor.
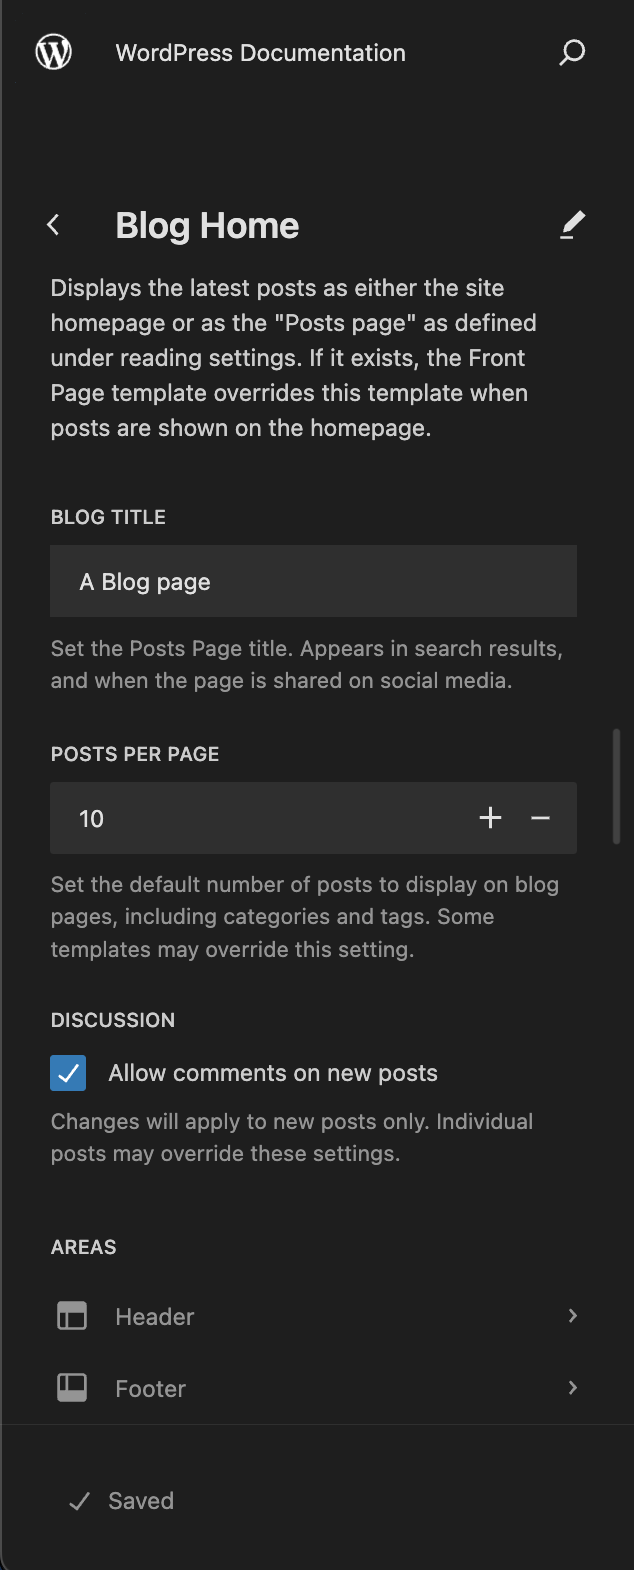
The blog page details sidebar
Different types of pages show different details in the sidebar. When you select a page that displays the latest posts, you can update settings related to your blog directly in the sidebar. You can:
- Edit the page title
- Select the number of posts per page
- Allow or disallow comments
There are also two shortcuts to editing your site header and site footer.
Create new pages in the Site Editor
You can click the plus icon on the Site Editor Pages sidebar to draft a new page. Selecting this button opens a new modal where you can add an optional page title:
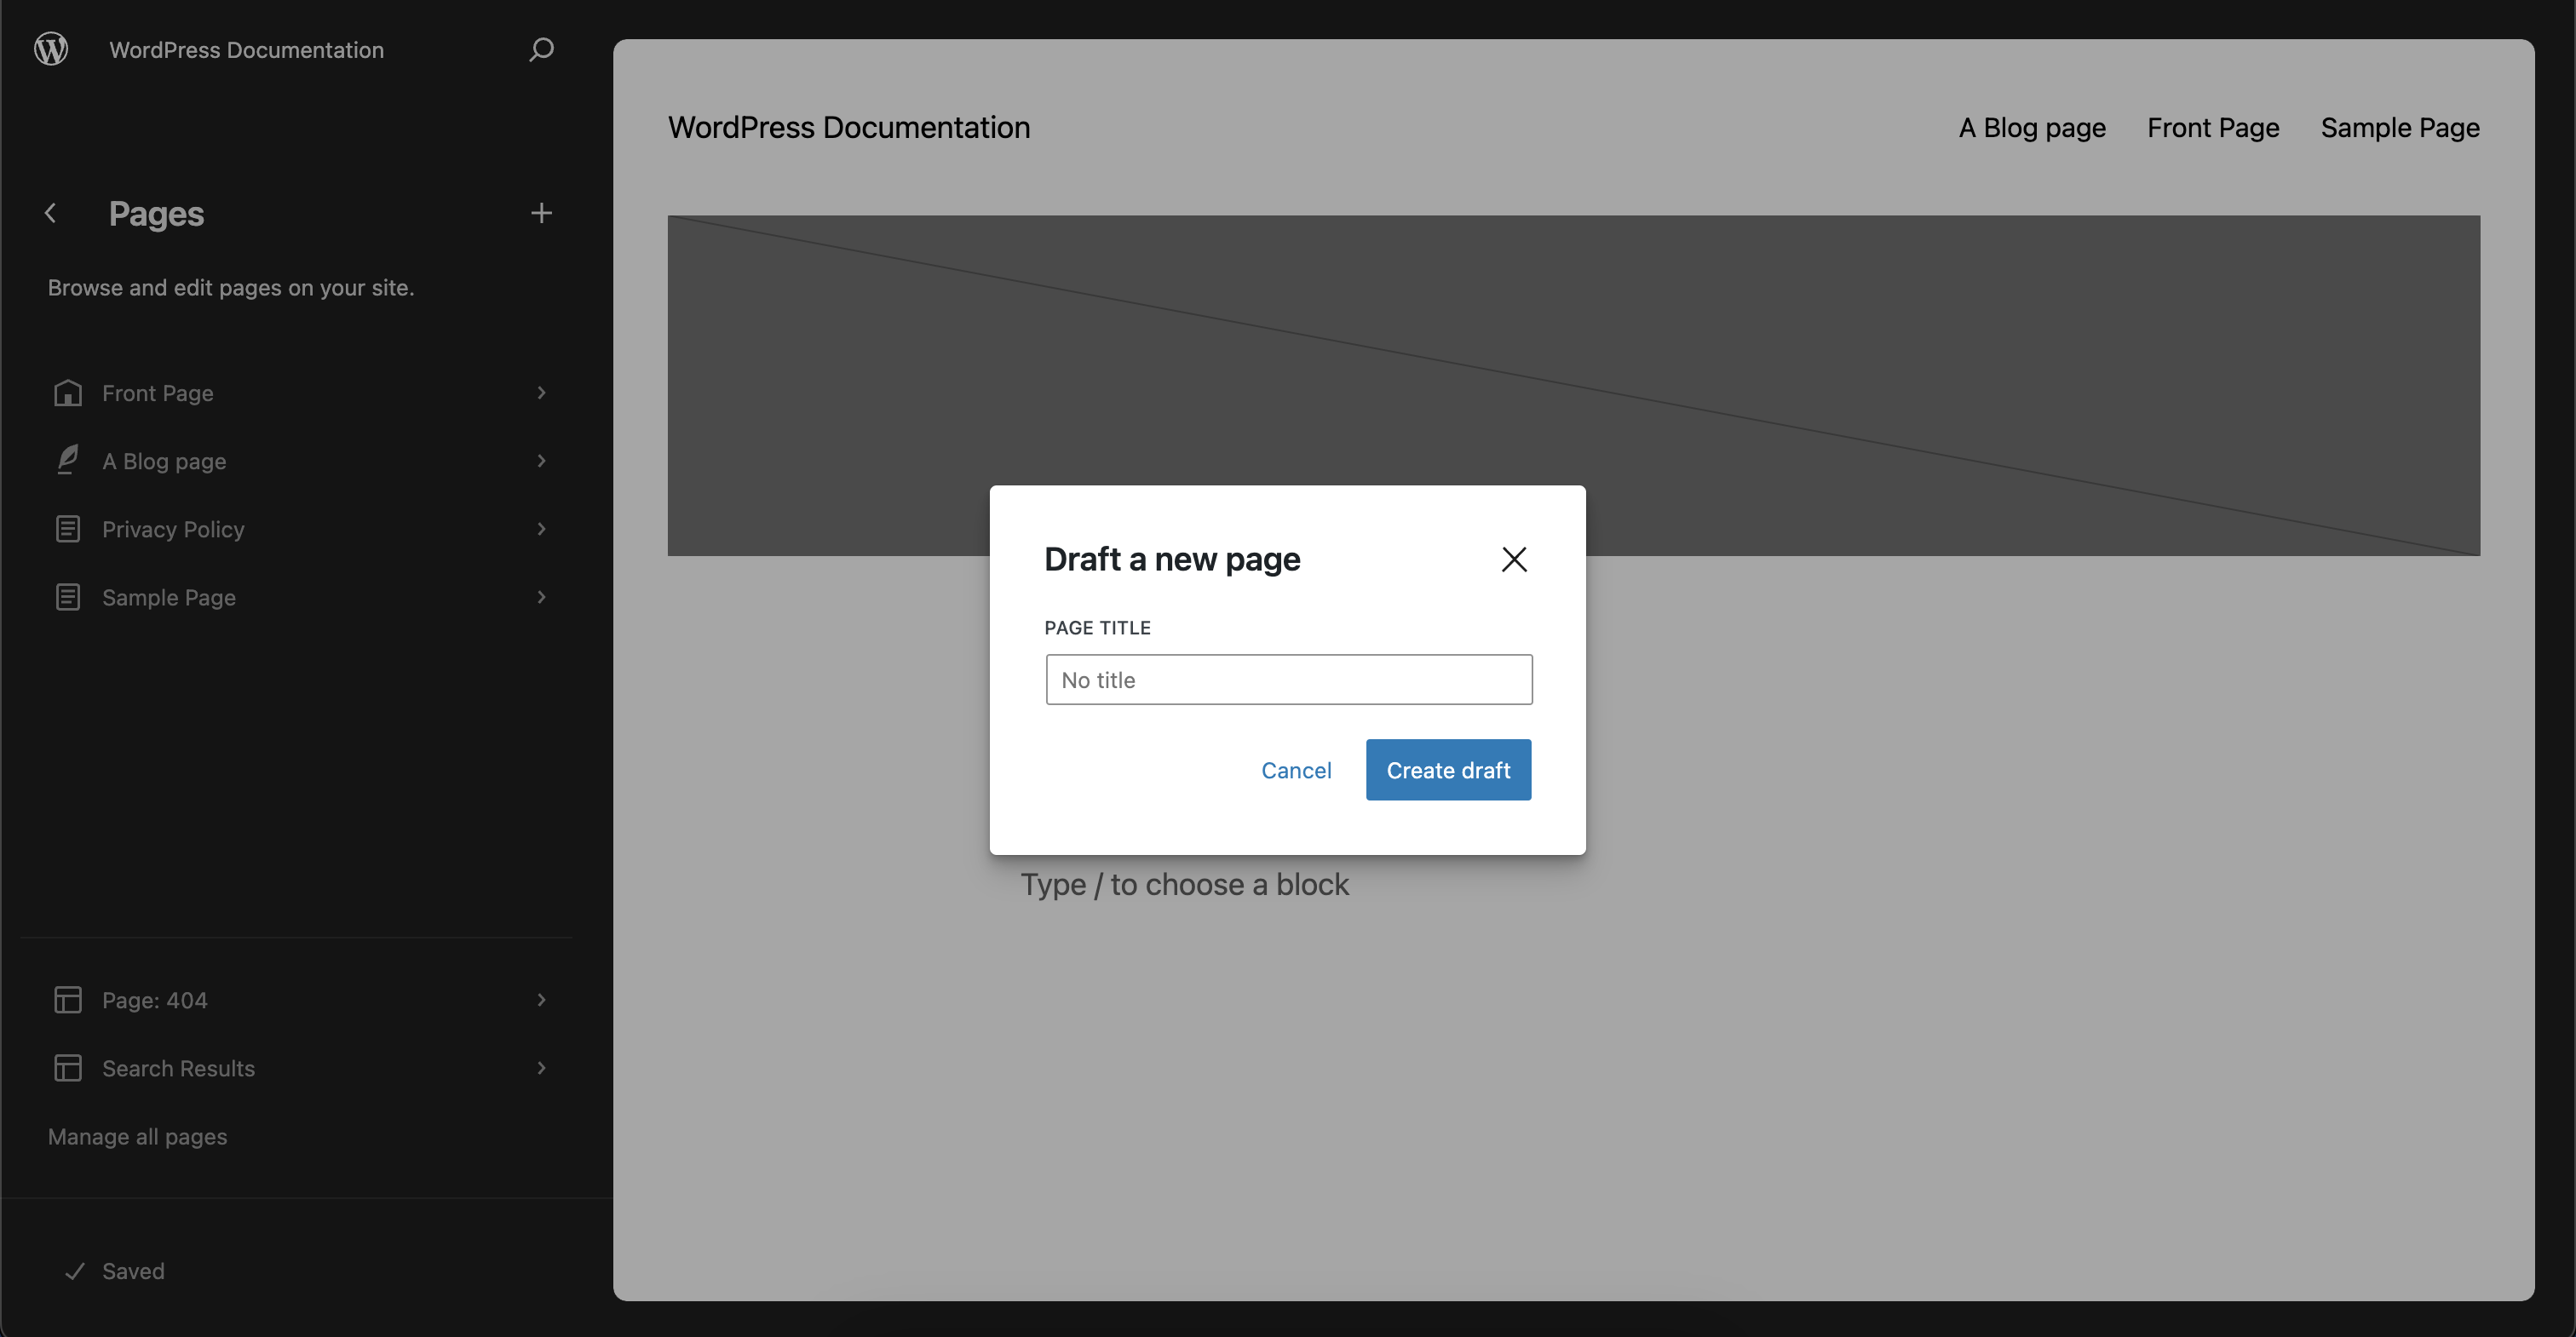
Selecting the Create draft button in the modal creates a new draft and redirects you to the screen where you can edit the new page.
Edit pages in the Site Editor
To start editing a page in the Site Editor, click anywhere in the preview window or select a page from the Pages menu and click the pen icon.
When you edit pages in the Site Editor, you can see your page content in the template. Depending on the template, you may see your site header, the page content, and your site footer:
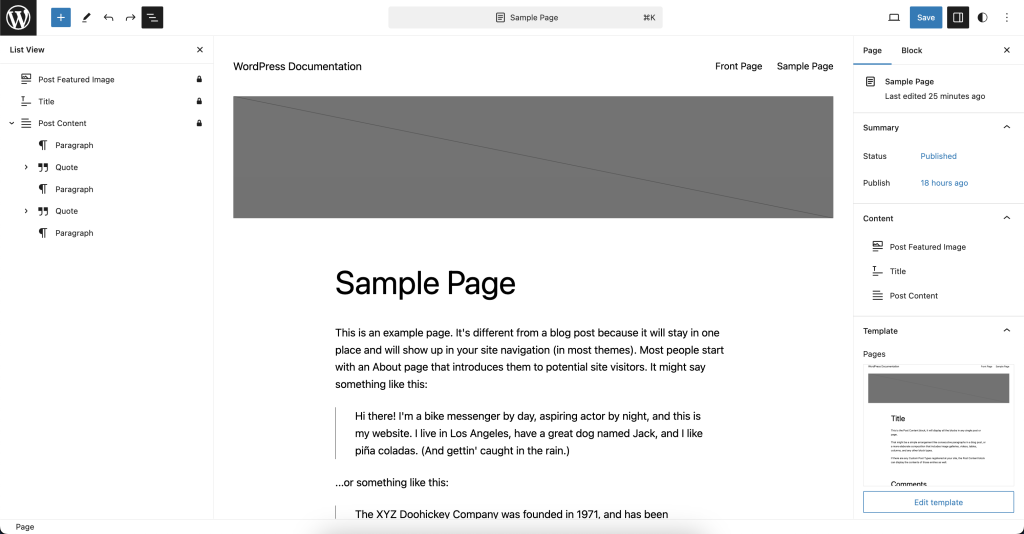
In the top right corner is a save button, a toggle button that opens the settings sidebar, a button that opens the Styles interface, and an options menu.
The page settings tab has four panels:
- The page title
- A summary panel with information about the page status and the publishing date.
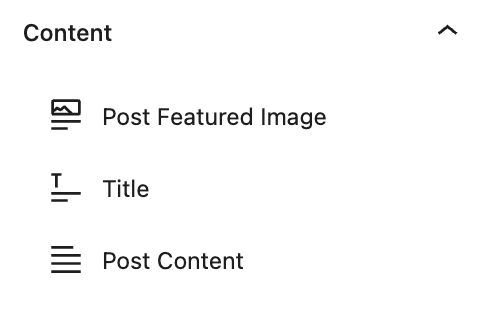
- The content panel lists the editable blocks, such as the title and post content blocks.
- The template panel shows the name and preview of the current template.
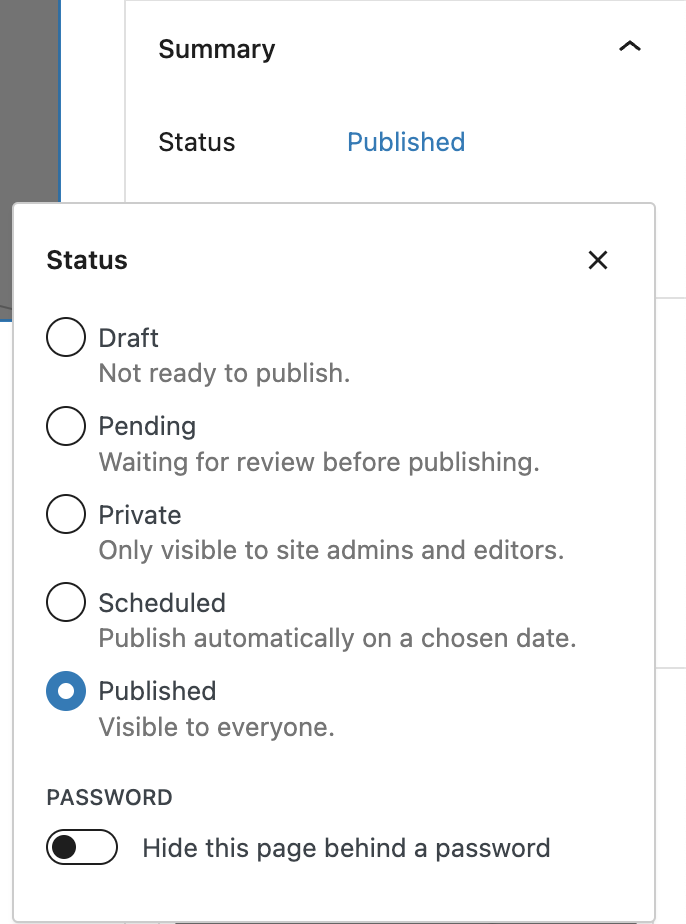
Status:
You can use the status option in the summary panel to change the page to a draft, schedule it, or add a password:
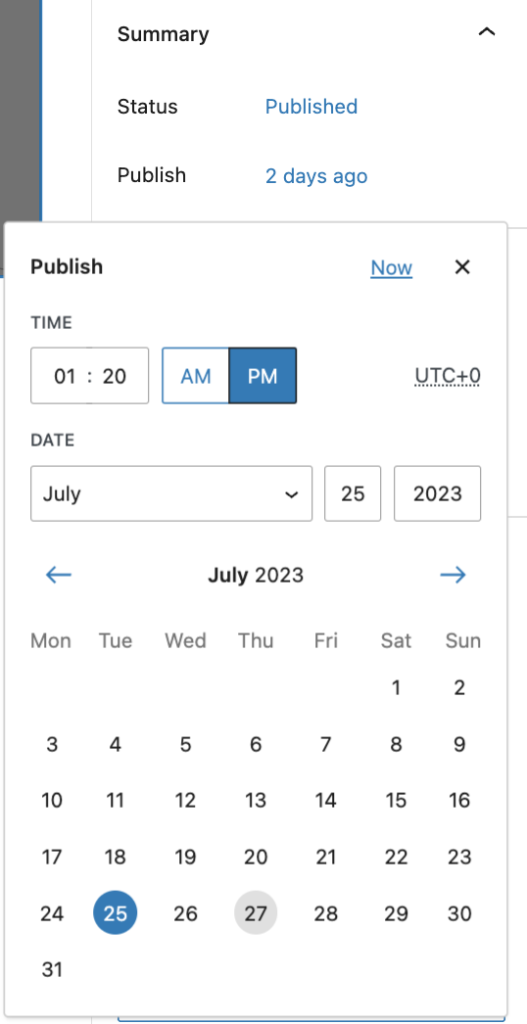
Publish:
You can use the publish option in the summary panel to change the publishing date of the page. You can enter a date and time using the input fields or select a date from the calendar. You can use the arrow buttons to change the month of the calendar.
Locked and editable blocks
Blocks in the template are locked and can not be selected without enabling the Edit template option. This prevents accidental editing of the template.
The blocks in the content panel in the settings sidebar can be edited, but not moved or deleted. These blocks can be selected, but do not have a block toolbar. Clicking on a block in the content panel selects the block in the editor.
In the example image below, the content panel includes a post featured image, the title block, and the post content block.
- Selecting the post featured image block will let you upload or add an image from the media library, but you can not remove the block.
- Selecting the title block will let you change the page title. But you can not change the title’s color or font size.
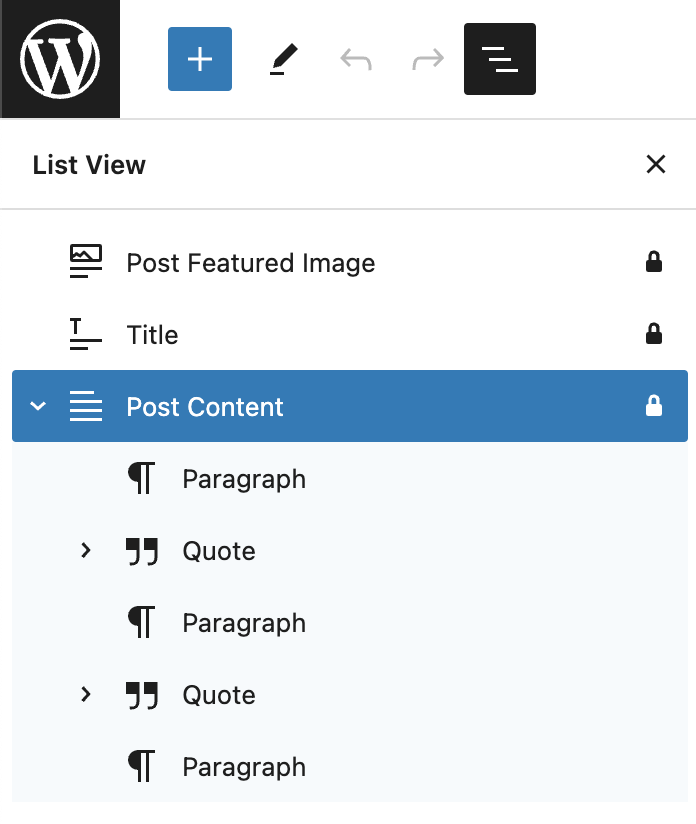
Blocks that are placed inside the Post Content block are editable. You can add new blocks, edit, move, and remove blocks. These are the same blocks that you would see in the block editor when editing the page.
In this example image, the editable blocks are the paragraph and quote blocks:
Enable template editing
When you click on a block in the template, WordPress shows a notification in the bottom left corner that says: Edit your template to edit this block.

You can also enable template editing by selecting the “Edit template” button in the template panel in the settings sidebar:
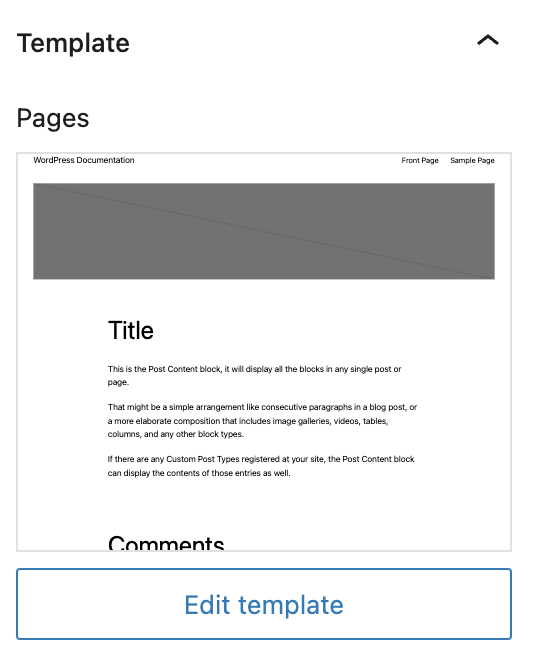
Now you are redirected, and you can make changes to the template.
To go back to the page, you can use the back button above the editor:

Or, you can click on the WordPress logo or site icon in the top left corner to open the Site Editor sidebar.
Resource Links
Changelog
- Updated 2023-08-24
- Edited some text
- Changed the category to Site Editor
- Created 2023-08-08
The Site Editor Patterns menu is only available when you install and activate a Block theme on your site.
Working with patterns
Navigate to Appearance > Editor > Navigation to access your Patterns and template parts.
Please note that template parts are now listed under Patterns.
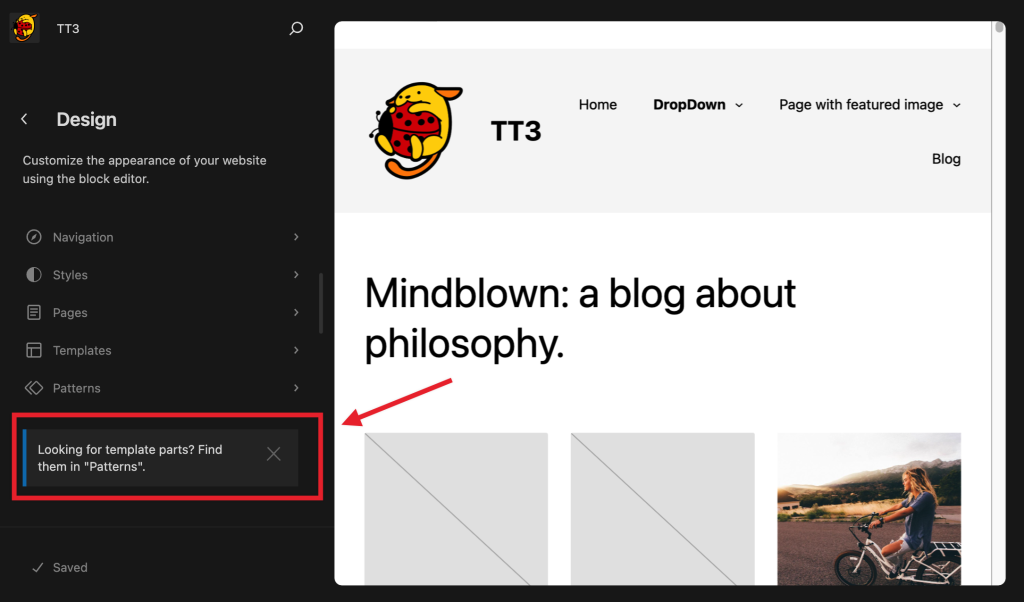
My patterns
The first item in the Patterns section is My patterns. This section lists all the custom patterns you added to your site yourself. They can be filtered by Synced or Standard (non-synced).
If you have a lot of Patterns, the Command Palette is another great find them. Learn more about the Command Palette here.
If you click on the Actions (ellipsis) button next to each pattern, you will see options to rename, duplicate or delete that pattern.
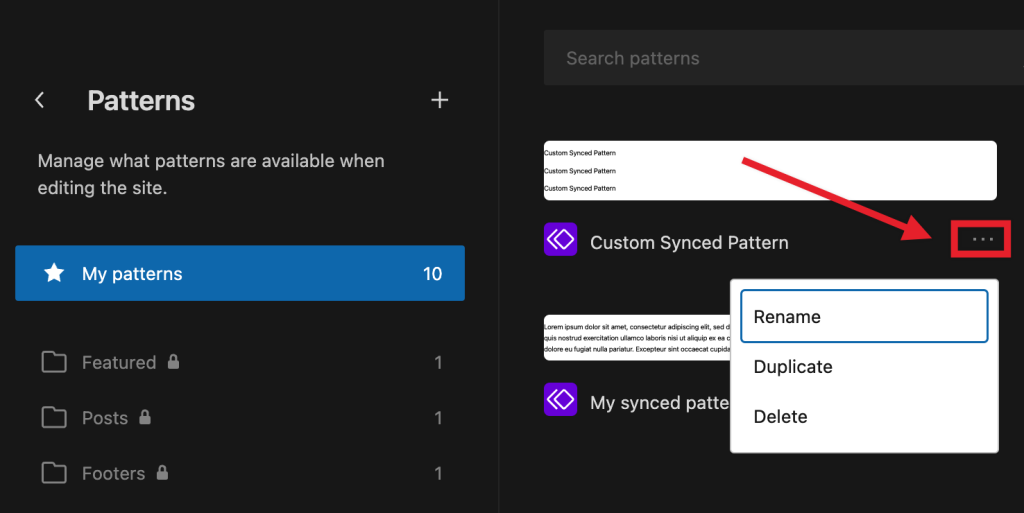
You can edit any pattern just by clicking on the pattern itself, on the right-hand side of your screen.
Theme patterns
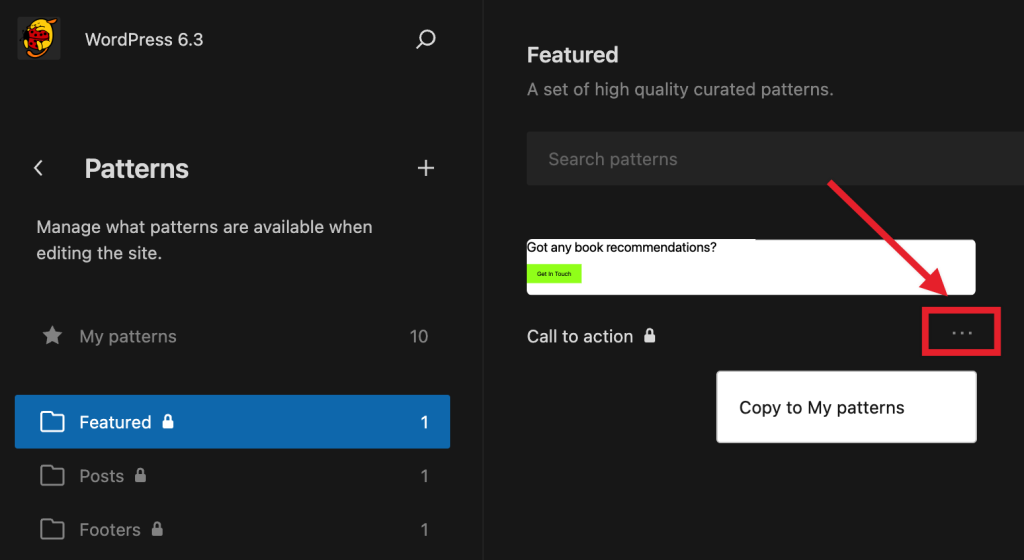
Underneath My patterns, you can find regular patterns that come bundled with your theme. These patterns cannot be edited directly. Instead, you can click on the Actions (ellipsis) button and click Copy to My patterns to create an editable copy of that pattern. This copy will be listed under My patterns.
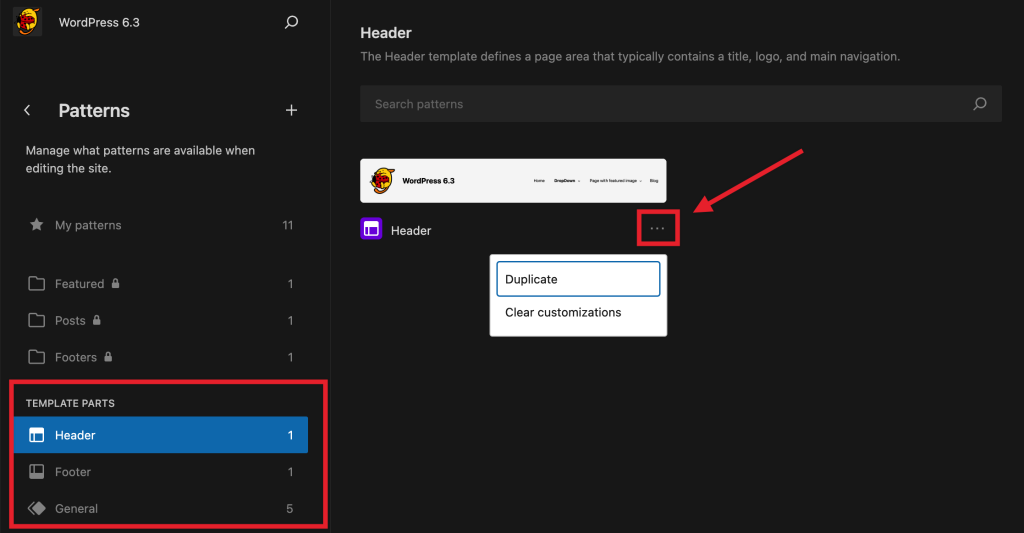
Template parts
The next type of pattern you will find are Template parts. Template parts are included with block themes and are typically used on multiple templates across your site.
If you click on the Actions (ellipsis) button, you will see an option to duplicate that Template part and a second option to clear customizations. If you choose this option, the Template part will be reset to the content, layout, and styles it had when you block theme was first installed.
Finally, you can edit the Template part by clicking on it directly.
Create new patterns
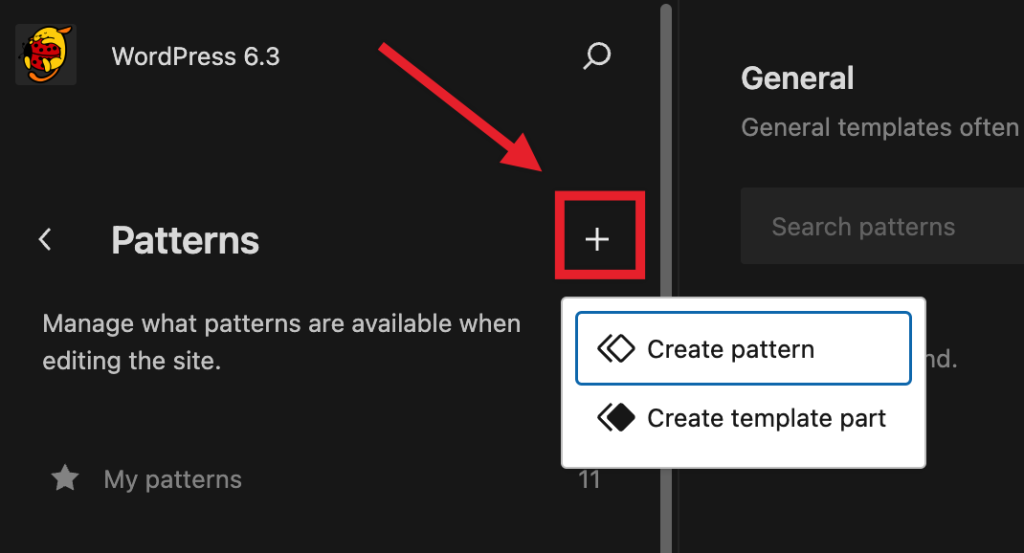
There is a create patterns (+) icon next to the Patterns sidebar title you can click on to create new patterns. If you click on it, you will see two options: Create pattern and Create template part.
You can learn more about the difference between Patterns and template parts here.
Manage all patterns and template parts
There are two links at the bottom of the Site Editor Pattern section:
- Manage all my patterns
- Manage all template parts

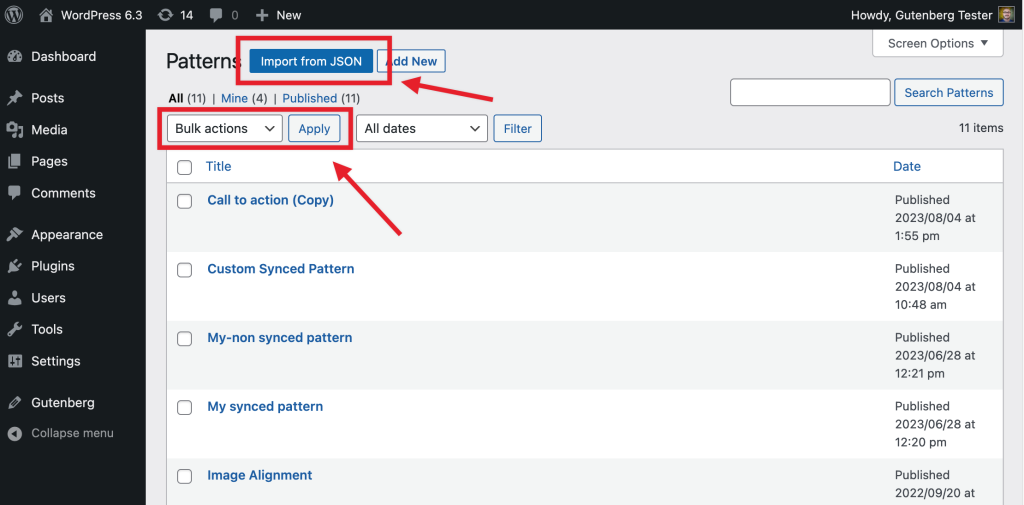
If you click on them, you will be redirected to an wp-admin view. This view can be convenient if you want to import patterns or apply bulk actions.
Changelog
- Updated 2023-08-24
- Updated formatting
- Updated category and subcategory
- Fixed some typos
- Created 2023-08-08