The Amazon Kindle embed block allows users to embed Amazon Kindle content.

Click the (+) icon to open the block inserter pop-up window and search for the Amazon Kindle embed block.
You can also use the keyboard shortcut /amazon-kindle to quickly insert an Amazon Kindle embed block.
Keep in mind that the link needs to follow this format: https://www.amazon.com/dp/ASIN where you will need to paste your preferred ASIN numbers and choose the corresponding locale (amazon.co.uk, amazon.com, and so on). More information can be found here: Linking from Your Website.

Then paste the preferred URL, click on the Embed button and the book’s details will be added:

Detailed instructions on adding blocks can be found here.
Block toolbar

The block toolbar contains the tools to customize each block. The Amazon Kindle block’s toolbar consists of the following tools:
Transform to

If you click the Embed icon on the toolbar, you will be able to convert the block into columns and group blocks.
Block-moving tools

Use the block-moving tools to move the block up and down inside the editor. Use the six dots icon to drag and drop the Amazon Kindle block and reposition it anywhere on the editor. Alternatively, click on the up and down arrows to move the block up or down the editor.
Change alignment

The change alignment tool is used for the Amazon Kindle block’s position and width:
- None – Uses the default alignment options.
- Wide width – Increase the width of the post beyond the content size.
- Full width – Extend the book embed to cover the full width of the screen.
- Align left – Make the book embedded, left aligned.
- Align center – Make the book embedded, center aligned.
- Align right – Make the book embedded, right aligned.
Edit URL

The edit URL button is used to modify the Amazon Kindle block embed link.
More options


Click on the three dots icon to show more block options. A drop-down menu with these actions will appear:
- Copy adds the Amazon Kindle block into the clipboard. Then, you can paste it anywhere you want in the block editor.
- Duplicate creates a copy of the selected block that appears after the current block.
- Add Before inserts a new block before the selected block(s).
- Add After inserts a new block after the selected block(s).
- Group allows you to create a group of blocks and treat them as a unit. You can, for instance, add a common background color or other blocks to the group.
- Lock lets you prevent users from moving or deleting the selected block. A pop-up window will appear to set the block locking attribute to the selected block. You can opt to disable movement, prevent removal, or both for the selected block.
- Rename let’s you create a custom name for the block.
- Create patterns lets you add the selected block to a list of Synced patterns, so you can use them on other posts or pages as well.
- Move to lets you use a blue line on the editor to indicate the new position for the selected block. Use your keyboard’s up and down arrows to move the blue line. When the line is in the desired position, press Enter to move the selected block to that position.
- Edit as HTML allows you to modify the HTML code of the embed block.
- Delete deletes the selected block from the content.
Block settings
The block settings panel contains customization options specific to the block. To open it, select the block and click the cog icon next to the Publish button.

Here are the options for the Amazon Kindle block:
Advanced
The Advanced tab lets you add CSS class(es) to your block. This will allow you to write custom CSS and styles for the block.

Changelog
- Updated 2024-09-16
- Updated broken and missing images.
- Replaced old images with current ones.
- Edited some texts to ensure they correlate with the images.
- Created 2022-11-11
With the Animoto Embed block, you can embed your own Animoto video which you have created on your Animoto account. You need an account to create/customize your own videos and embed them into your post. A user who does not have an Animoto account can play the full video from the post.?
Embedded Animoto Video

Steps to Embed a video from Animoto
1. Find the video URL on Animoto- Open your video which you can find in your Animoto Account > My video area and click on the Share button.

2. Click on the Share icon- From the share tab, click on the link icon which will open a pop-up window.

3. Copy the link of the Animoto video – Click on the Copy to Clipboard button to copy your video link easily.

4. Add the Animoto Block from the Block list
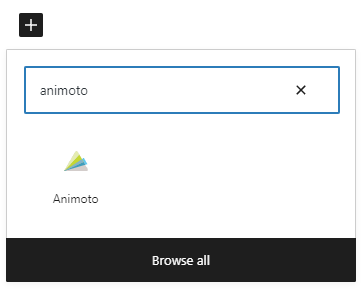
Detailed instructions on adding blocks
5. Paste the video link in the URL box
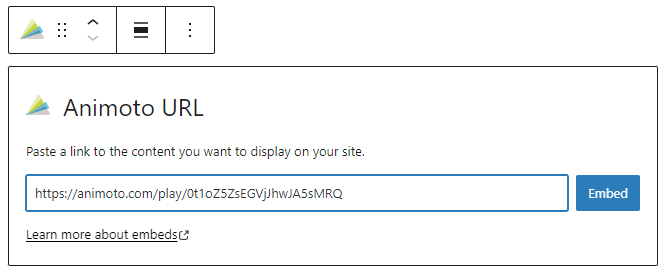
6. Click the Embed button-If it’s a link that can be successfully embedded you will see a preview in your editor.
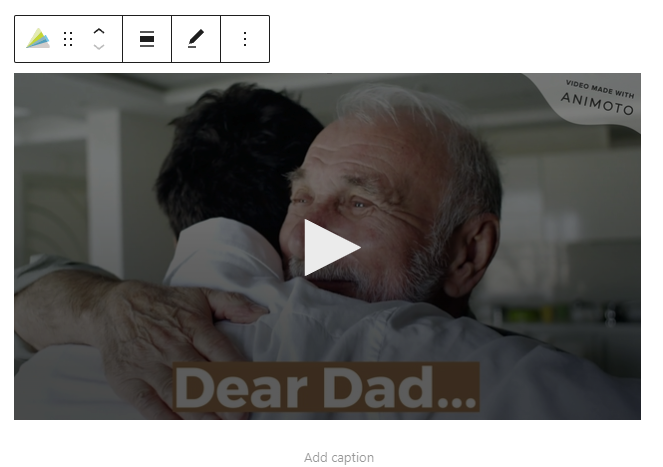
If you use a URL that can’t be embedded, the block shows the message “Sorry, this content could not be embedded.” You will have two choices: Try again with a different URL or Convert to link.

Block toolbar
Besides the Mover and Drag & Drop Handle, the Block Toolbar for the Animoto embed block shows four buttons:
- Transform to
- Change alignment
- Edit URL, and
- More options.?

Transform to

The Animoto embed can be transformed into a group. This gives the ability to change the background color around the Animoto embed.
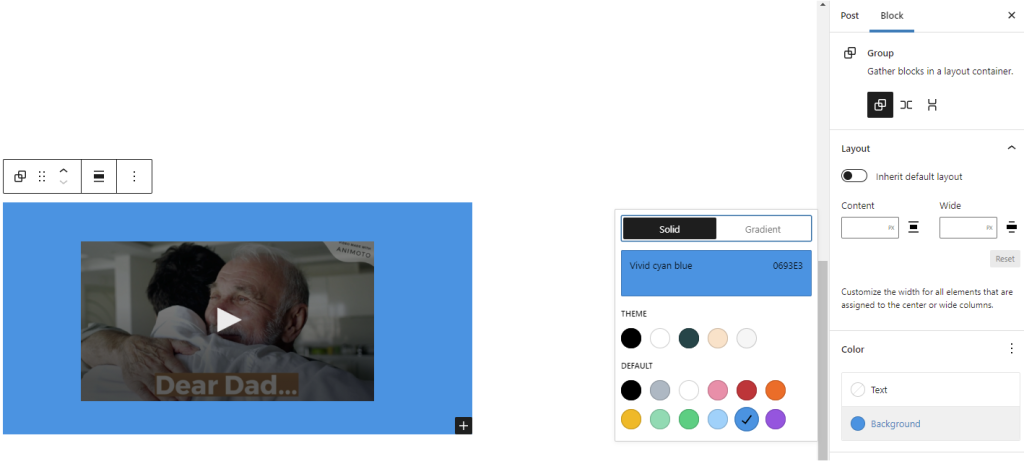

Change alignment
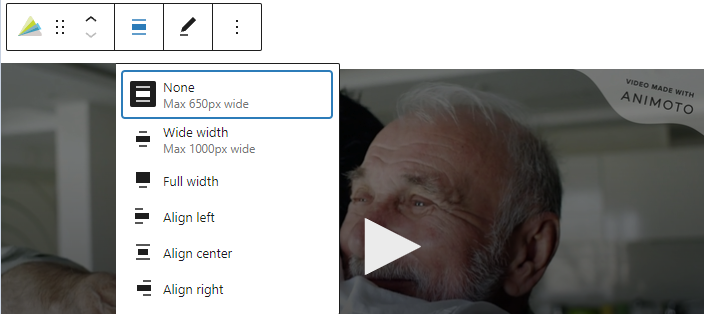
- Align left – Make the Animoto post left aligned
- Align center – Make the Animoto post alignment centered
- Align right – Make the? Animoto post, align right
- Wide width – Increase the width of the post beyond the content size
- Full width – extend the Animoto post to cover the full width of the screen.
Wide width and Full width alignment need to be enabled by the theme of your site.?
Edit URL
Via the Edit URL, you can change the Animoto Embed URL in the embed block. Overwrite the existing URL and click on the Embed Button.

More options
These controls give you the option to copy, duplicate, and edit your block as HTML.
Read about these and other settings.
Block settings
Advanced
The advanced tab lets you add a CSS class to your block, allowing you to write custom CSS and style the block as you see fit.

Changelog
- Updated 2022-11-26
- Removed redundant content
- Added alt text to images
- Updated 2020-09-04
- Screenshots updated to 5.5
- Updated 2020-08-18
- Replaced “More Options” – new screenshot
- Added “Move To” and “Copy” section under More Options
- Update 2020-08-10
- fixed graphics, captions, removed residue from the template.
- Created 2020-07-05
Embedded Cloudup content:
Steps to embed Cloudup content:
- Go to Cloudup.com and request an account to start using the service. You need an account to use the service.
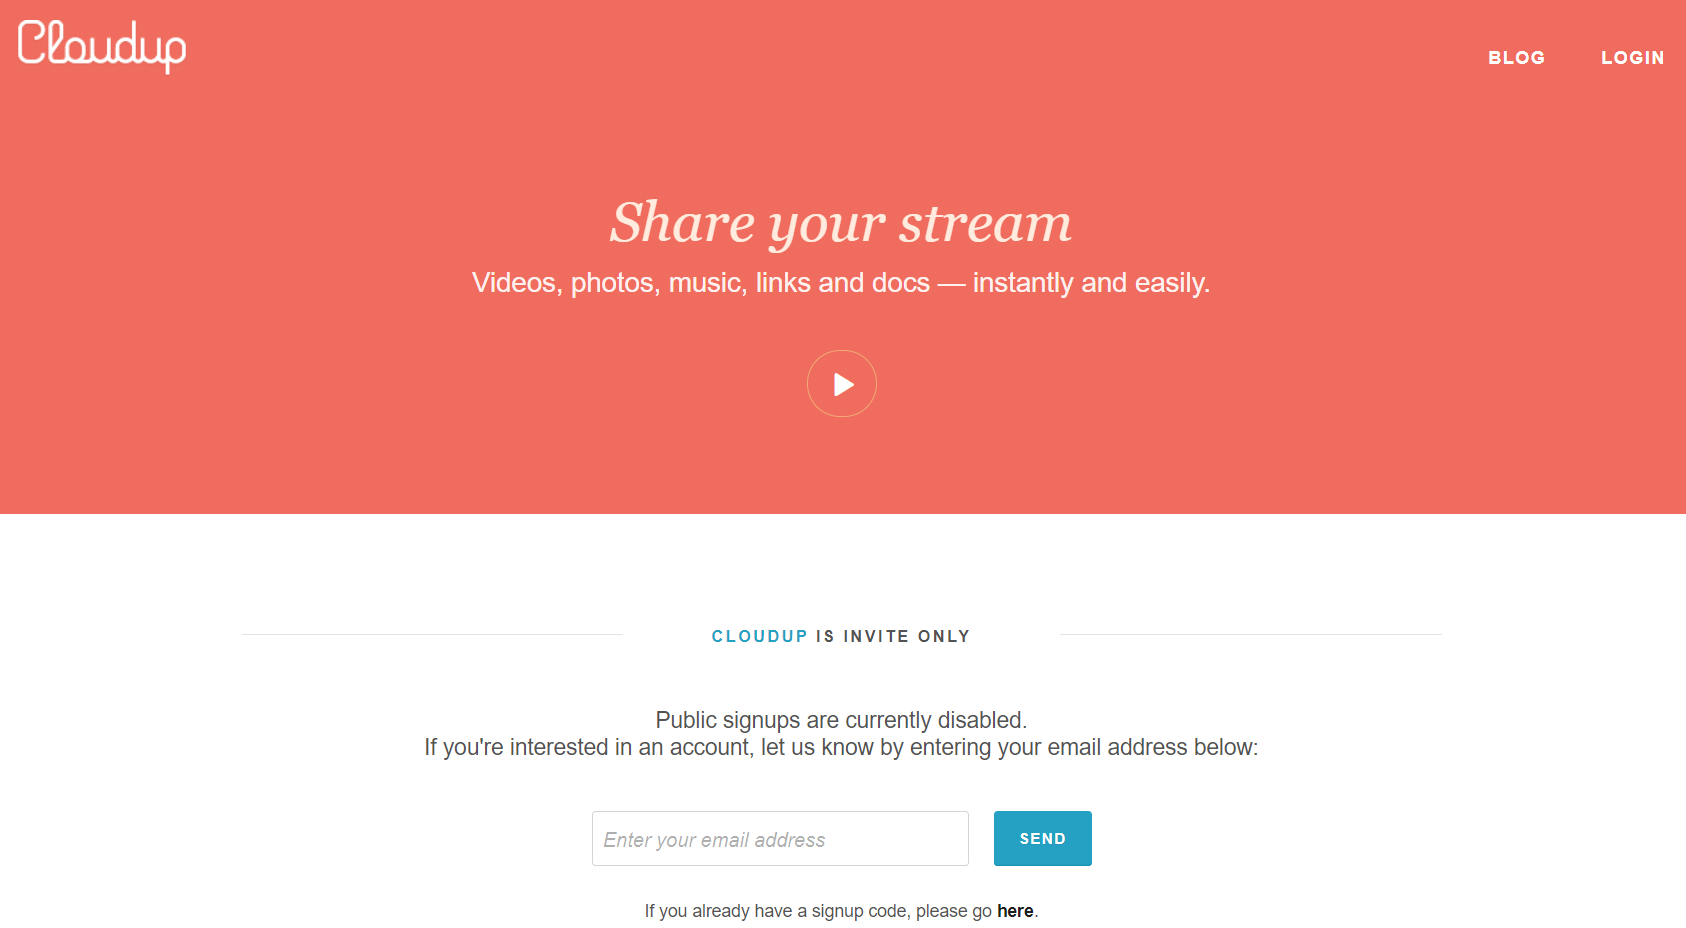
- When/If you have a Cloudup account.
You can copy the custom links of the contents you want to embed on your page/post
- Add a Cloudup Embed Block to your post/page
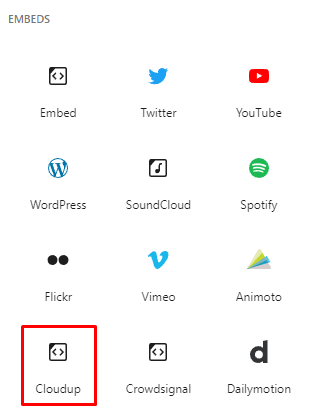
- Paste the Cloudup link
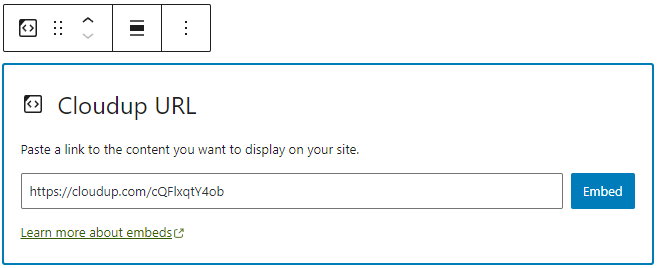
- Click the “Embed” button
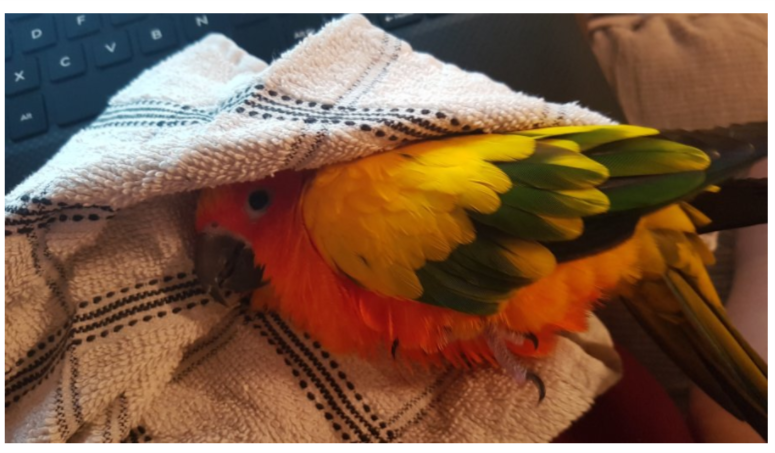
If it’s a link that can be successfully embedded you will see a preview in your editor.
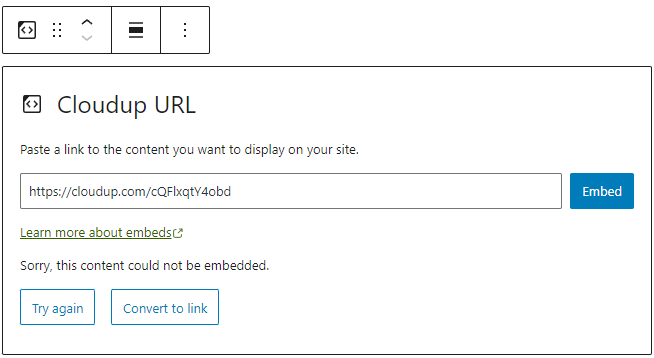
If you use a URL that can’t be embedded, the block shows the message “Sorry, this content could not be embedded.” You will have two choices: Try again with a different URL or convert to link.
Block toolbar

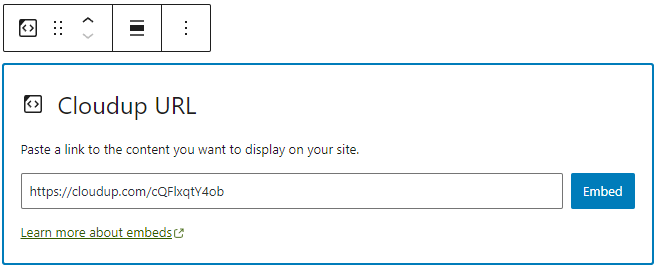
Besides the Mover and Drag & Drop Handle, the Block Toolbar for the Cloudup embed shows four buttons:
- Transform to
- Change alignment
- Edit URL, and
- More Options.
Transform to

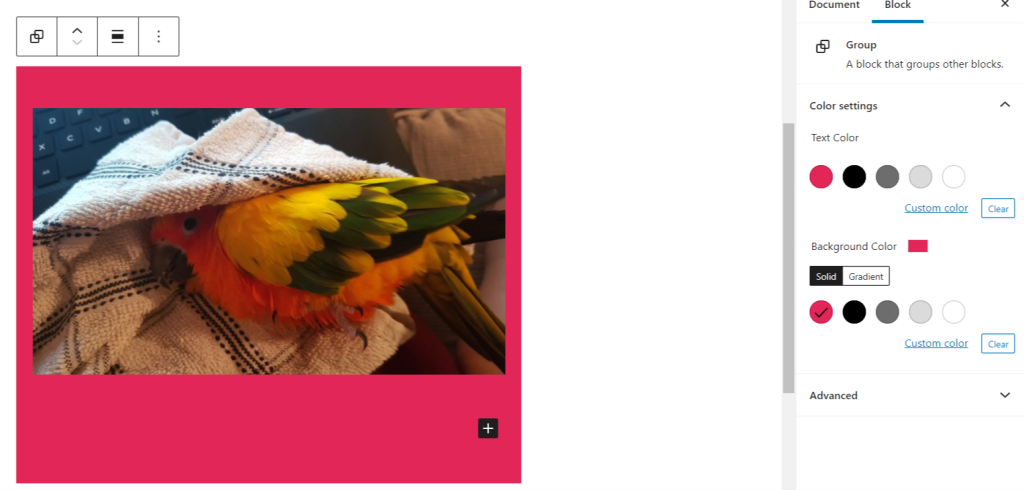
You can transform a Cloudup embed to a Group. This would give you the ability to change the background and text color around the Cloudup embed.

Change alignment

- Align left – Make the Cloudup embed post-left-aligned.
- Align center – Make the Cloudup embed post alignment centered.
- Align right – Make the Cloudup embed post-align-right.
- Wide width – Increase the width of the Cloudup embed post beyond the content size.
- Full width – extend the Cloudup embed post to cover the full width of the screen.
“Wide width” and “Full width” alignment need to be enabled by the Theme of your site.
Edit URL

Via the edit URL icon, you can change the Cloudup embed URL in the embed block. To overwrite the existing URL and click on the “Embed” button.
More options
These controls give you the option to copy, duplicate, and edit your block as HTML.
Read about these and other settings.
Block settings
Media settings
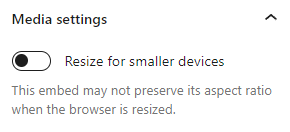
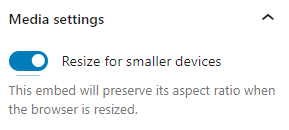
Via the Media Settings, you can control the behavior of your post embed when viewed from a smaller device, like on a phone screen.
The Toggle switch turns on or off the resize functionality for smaller devices. The default setting is “on” or blue.
“Off:” This embed may not preserve its aspect ratio when the browser is resized. In the off position, the toggle switch is gray.
“On:” This embed will preserve its aspect ratio when the browser is resized. The toggle switch turns blue in the “On” position.
Advanced
The advanced tab lets you add a CSS class to your block, allowing you to write custom CSS and style the block as you see fit.

Changelog
- Updated 2023-02-07
- Updated images
- Fixed headings capitalization
- Added alt text to images
- Updated 2022-11-26
- Removed redundant content
- Aligned images for mobile view
- Added alt text to images
- Created 2020-08-24
With the Crowdsignal Embed block, you can embed Crowdsignal polls (or surveys or votes) into your posts and pages. You need a Crowdsignal account to be able to create polls (or surveys or votes) before you can embed them into your posts or pages.
Example of an Embedded Crowsignal Poll:

Steps to embed Crowdsignal polls (or surveys or votes):
- Go to crowdsignal.com and signup for a free account.
On your Crowdsignal Dashboard, create a new survey, poll, quiz, or rating, or select one you’ve already created.

- Get the custom link to share your poll
Either from the Dashboard or within the editor, find the “Share” button.


Within the Share Your Poll pop up, click “Copy to Clipboard”.

- Add a Crowdsignal Embed Block to your post/page

Detailed instructions on adding blocks
- Paste the Crowdsignal Poll link from step 2 into the text box

- Click the “Embed” button
If it’s a link that can be successfully embedded you will see a preview in your editor.

If you use a URL that can’t be embedded, the block shows the message “Sorry, this content could not be embedded.” You will have two choices: Try again with a different URL or convert to link.

Block Toolbar
Besides the Mover and Drag & Drop Handle, the Block Toolbar for the Crowdsignal embed shows four buttons:
- Transform to
- Change alignment
- Edit URL, and
- More options.

Transform to:

You can transform a Crowdsignal embed into a Paragraph, Columns, or Group. Transforming it into a Group would give you the ability to change the background color around the Crowdsignal embed.


Change alignment:

- Wide width – Increase the width of the post beyond the content size
- Full width – extend the Crowdsignal post to cover the full width of the screen.
- Align left – Make the Crowdsignal post left aligned
- Align center – Make the Crowdsignal post alignment centered
- Align right – Make the Crowdsignal post align right
“Wide width” and “Full width” alignment need to be enabled by the Theme of your site.
Edit URL:
Via the edit URL, you can change the Crowdsignal Embed URL in the embed block. Overwrite the existing URL and click on the “Embed” Button.

More options
The More Options menu represented by three vertical dots on the far right of the toolbar gives you more features such as the ability to duplicate, remove, or edit your block as HTML.?
Read about these and other settings.
Block Settings
Besides the Advanced section, the Crowdsignal embed has only one other setting in the “Block Settings” sidebar: Media Settings.
Media Settings


Via the Media Settings you can control the behavior of your embed when viewed from a smaller device, like on a phone screen.
The Toggle switch turns on or off the resize functionality for smaller devices. The default setting is “on” or blue.
“Off:” This embed may not preserve its aspect ratio when the browser is resized. In the off position, the toggle switch is gray.
“On:” This embed will preserve its aspect ratio when the browser is resized. The toggle switch turns blue in the “On” position.
Advanced
The “Advanced” tab lets you add CSS class(es) to your block.

The “Additional CSS class(es)” lets you add CSS class(es) to your block, allowing you to write custom CSS and style the block as you see fit.
Changelog
- Updated 2022-11-26
- Removed redundant content
- Aligned images for mobile view
- Updated 2022-08-29
- Removed the external link
- Updated 2022-08-26
- Video walkthrough created
- Updated with images from WordPress 6.0
- Added new “Transform to” setting (Column)
- Added “Lock” information under More Options
- Added ALT tags for the images
- Updated 2020-08-17
- Updated 5.5 screenshots
- Replaced “More Options” – new screenshot,
- Added “Move to” and “Copy” section under More Options
- Updated 2020-07-25
- Uploaded image for crowdsignal embed with green background
- Created 2020-07-03
Steps to embed a Dailymotion video in your post or page
- Locate the video and copy the URL from Dailymotion.com in the browser bar

- Add a Dailymotion Embed block to your post

Detailed instructions on adding blocks
- Paste the video URL into the text box

- Click the “Embed” button
If it’s a link that can be successfully embedded you will see a preview in your editor.
You’ll see your video in the block editor, with the option to write a caption underneath.

If you use a URL that can’t be embedded, the block shows the message “Sorry, this content could not be embedded.” You will have two choices: Try again with a different URL or Convert to link.

Block Toolbar
Besides the Mover and Drag & Drop Handle, the Block Toolbar for the Dailymotion embed shows four buttons:
- Transform to
- Change alignment
- Edit URL, and
- More Options.

Transform to:

You can transform a Dailymotion embed into a Paragraph, Columns, or Group. Transforming it into a Group would give you the ability to change the background color around the Dailymotion embed.


Change alignment:

- Wide width – Increase the width of the post beyond the content size
- Full width – extend the Dailymotion post to cover the full width of the screen.
- Align left – Make the Dailymotion post left aligned
- Align center – Make the Dailymotion post alignment centered
- Align right – Make the Dailymotion post align right
“Wide width” and “Full width” alignment need to be enabled by the Theme of your site.
Edit URL:
Via the edit URL, you can change the Dailymotion Embed URL in the embed block. Overwrite the existing URL and click on the “Embed” Button.

More options
The More Options menu represented by three vertical dots on the far right of the toolbar gives you more features such as the ability to duplicate, remove, or edit your block as HTML.?
Read about these and other settings.
Block Settings
Besides the Advanced section, the Dailymotion embed has only one other setting in the “Block Settings” sidebar: Media Settings.
Media Settings


Via the Media Settings you can control the behavior of your embed when viewed from a smaller device, like on a phone screen.
The Toggle switch turns on or off the resize functionality for smaller devices. The default setting is “on” or blue.
“Off:” This embed may not preserve its aspect ratio when the browser is resized. In the off position, the toggle switch is gray.
“On:” This embed will preserve its aspect ratio when the browser is resized. The toggle switch turns blue in the “On” position.
Advanced
The “Advanced” tab lets you add CSS class(es) to your block.

The “Additional CSS class(es)” lets you add CSS class(es) to your block, allowing you to write custom CSS and style the block as you see fit.
Changelog
- Updated 2022-11-26
- Removed redundant content
- Aligned images for mobile view
- Updated 2020-08-27
- Updated 5.5 Screenshots
- Updated 2020-08-19
- Replaced “More Options” – new screenshot
- Added “Move To” and “Copy” section under More Options
- Updated 2020-08-11
- Screenshots as per WordPress 5.5
- Embedded VideoPress video
- Created 2020-07-27
When you are embedding content, you don’t need to upload the content to your WordPress site. You are creating a link to the content, from within your post or page.
Using the generic Embed Block, you can paste the URL from the third-party site that you want to embed the content such as YouTube, Vimeo, TED, etc on your post or page.

You can also use Embed blocks build for specific third-party services such as YouTube Embed, Vimeo Embed, etc.
For a full list of embeds, check out the article: list of all embed blocks.
List of sites you can embed from
WordPress can embed content from the services listed below:
- Facebook and Instagram: Due to Facebook’s decision to close the oEmbed end point for embedding Facebook and Instagram links, the block will not work anymore after October 24, 2020. To embed Facebook and Instagram links into your site, you need a developer account and an appid, and provide an authentication token with their call to the endpoint. Refer to the Facebook Documentation.
- Tumblr – only posts (name.tumblr.com/post/etc) are recognized, not standalone images (name.tumblr.com/image)
- Twitter – older versions of WordPress have issues with https embeds. Remove the ‘s’ from the https to fix the issue.
- YouTube – only public and “unlisted” videos and playlists can be embedded. “private” videos cannot be embedded.
External resources
- oEmbed.com – Official oEmbed website with technical details of the spec
Embeds changelog
- 2.9 :
- Introduction of the builtin Embeds support.
- 3.0 :
- Added: SmugMug, FunnyOrDie
- 3.4 :
- Added: Twitter
- 3.5 :
- Embed options were removed from the Settings Media Screen.
- Added: Instagram, SoundCloud, SlideShare
- 3.6 :
- Added: Rdio, Spotify
- 3.9 :
- Removed: Qik (the service shutting down in April 2014)
- 4.0 :
- Major reworking of the preview code showing embeds within the editor wp.mce.views.
- Added: CollegeHumor, Issuu, Mixcloud, YouTube playlists, TED talks
- Removed: Viddler (removed due to the service shutting down their oEmbed endpoint)
- 4.1 :
- Added: Vine
- 4.2 :
- Added: Kickstarter, Tumblr
- Removed: Revision3
- 4.4 :
- Added: ReverbNation, Cloudup, Reddit, SpeakerDeck, VideoPress
- Removed: Blip
- 4.4.1 :
- Removed: Rdio (Service shut down)
- 4.5 :
- Added: Twitter Moment, collection
- 4.7 :
- Added: Twitter profile, list, likes
- Added: Facebook post, activity, photo, video, media, question, note
- 5.1 :
- Renamed: PollDaddy service has been renamed to Crowdsignal
- 5.6 :
- Added section about the Block Editor for embeds, created a new column for Block Editor documentation links, note about Facebook and Instagram ending OAuth, updated Codex links, added a new changelog and reordered page.
- Added: TikTok
- Removed: Blip, Hulu, CollegeHumor, FunnyOrDie.com and Vine
- 6.0:
- Removed: Meetup.com, and Giphy,
- Added Screencast, Pinterest, Wolfram
- 6.1:
- Added: Pocket Casts
- 6.2:
- Added: YouTube provider for live URLs
Changelog
- Updated 2022-11-25
- Added Pocket Casts
- Updated 2022-08-16
- Removed Meetup.com, and Giphy, Added Screencast, Pinterest, Wolfram
- Removed oEmbed info and Usage info.
- Updated content and added ALT tags for the images
- Updated 2020-12-08
- Added section about the Block Editor for embeds, created a new column for Block Editor documentation links, noted about Facebook and Instagram ending OAuth, added new Changelog, updated Codex links, and reordered page.
- Added: TikTok
- Removed: Blip, Hulu, CollegeHumor, FunnyOrDie.com, and Vine; Some external links that violated our external linking policy or were out-of-date.
Due to Facebook’s decision to close the oEmbed end point for embedding Facebook links, the block will not work anymore after October 24, 2020. Publishers who want to embed Facebook links into their sites will require a developer account and an appid, and provide an authentication token with their call to the endpoint. Facebook Documentation: create an app
WordPress leadership reached out to Facebook but it seems the policy change is final. Apart from alerting users here and in other places, WordPress contributors can’t do anything about it.
Facebook Embed block allows you to add Facebook posts to your post or pages. Keep in mind that the post needs to be public in order to add it.
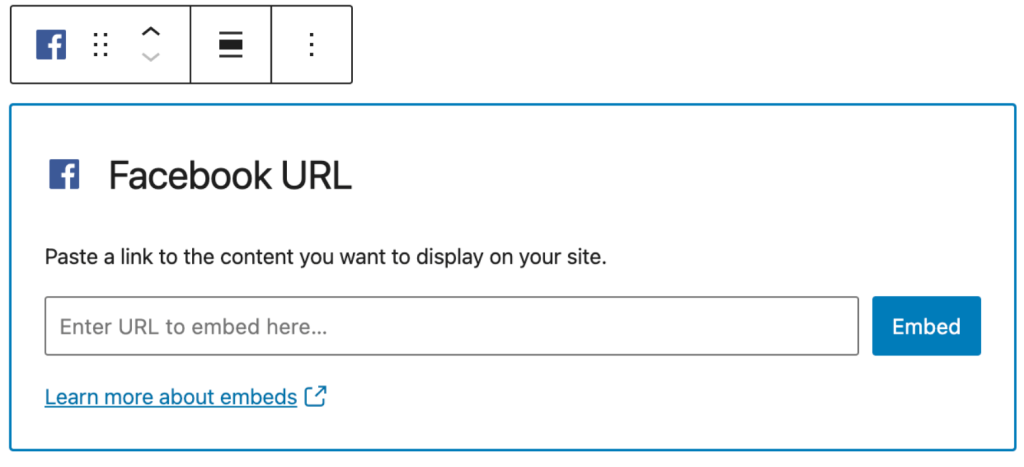
Besides Facebook Posts, you can also share links to Facebook Photos, Facebook Albums, and Facebook Videos.
Note that you can not embed Facebook pages, Facebook events, and Facebook groups.
Embedding a Facebook post is as simple as following these steps:
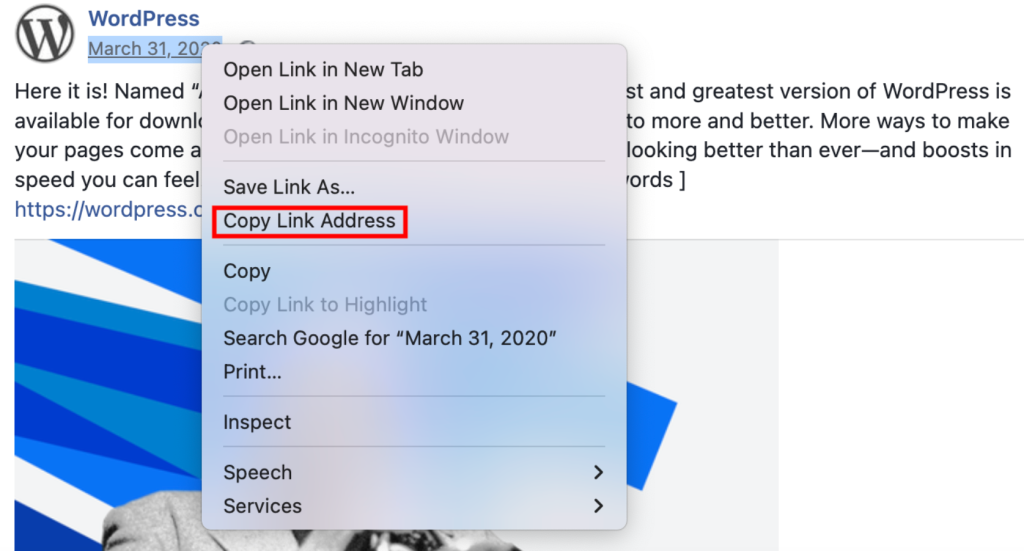
- Copy the preferred link from the Facebook post you want to embed. Make sure it’s a public post.
- From the WordPress dashboard, go to your post and click the (+) icon to open the block inserter pop-up window and search for the Facebook block. You can also use the keyboard shortcut /facebook to quickly insert a Facebook block.

Detailed instructions on adding blocks
- Paste the link that you’ve copied and click Embed.

- In your editor, you see the link and the comment “Embedded content from facebook.com can’t be previewed in the editor”.
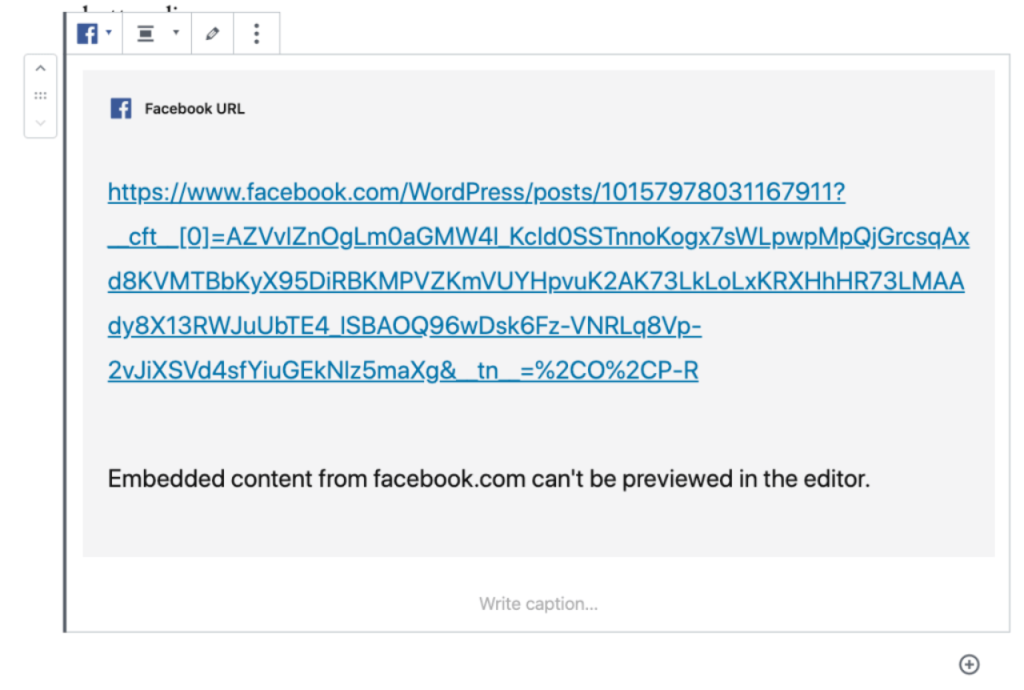
- Use the Preview button to see how the post fits into your post/page

Block Toolbar

The block toolbar contains the tools to customize each block. The Facebook block’s toolbar consists of the following tools:
Transform to

You can transform a Facebook embed into a Group. This would give you the ability to change the background color around the Facebook embed.
Block-moving tools

Use the block-moving tools to move the block up and down inside the editor. Use the six dots icon to drag and drop the Facebook block and reposition it anywhere on the editor. Alternatively, click on the up and down arrows to move the block up or down the editor.
Change alignment
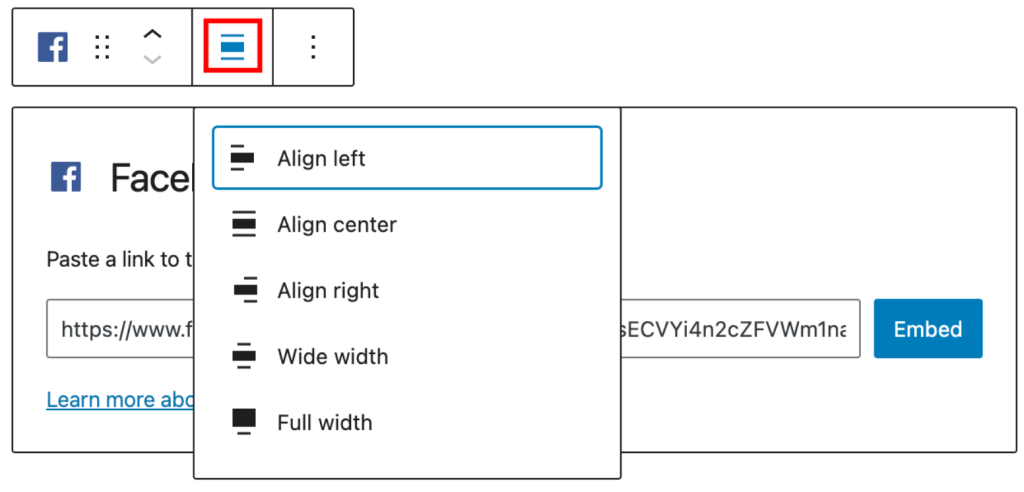
- Align left – Make the Facebook post left aligned
- Align center – Make the Facebook post alignment centered
- Align right – Make the Facebook post align right
- Wide width – Increase the width of the post beyond the content size
- Full width – Extend the Facebook post to cover the full width of the screen.
Note: “Wide width” and “Full width” alignments need to be enabled by the Theme of your site.
More options

These controls give you the option to copy, duplicate, and edit your block as HTML.
Read about these and other settings.
Block Settings
The block settings panel contains customization options specific to the block. To open it, select the block and click the cog icon next to the Publish button.

Besides the Advanced section, the Facebook embed has only one setting in the “Block Settings” sidebar: Media Settings.
Media settings


Via the Media Settings you can control the behavior of your post embed when viewed from a smaller device, like on a phone screen.
The Toggle switch turns on or off the resize functionality for smaller devices. The default setting is “on” or blue.
“Off:” This embed may not preserve its aspect ratio when the browser is resized. In the off position the toggle switch is gray.
“On:” This embed will preserve its aspect ratio when the browser is resized. The toggle switch turns blue in the “On” position.
Advanced settings
The “Advanced” tab lets you add CSS class(es) to your block. This will allow you to write custom CSS and styles to the block.
Changelog
- Updated 2024-09-27
- Updated broken image Screenshots.
- Fixed inconsistent “Facebook” capitalization issue in the images’ ALT texts.
- Updated 2022-08-16
- Fixed formatting, updated screenshots, and added new information about block-moving tools functionality.
- Added ALT tags for the images
- Updated 2020-09-21
- Announcement of discontinuation of Facebook block in v. 9.0 and WordPress 5.6
- Updated 2020-08-18
- Replaced “More Options” – new screenshot
- Added “Move To” and “Copy” section under More Options
- Updated 2020-04-21
- Add sentence to the Alignment about Theme support for wide width and full width options.
- Created 2020-04-20
With the Flickr embed block, you can add photos and videos from Flickr to your posts and pages. However, when you click any photo or video, it will take you to Flickr where you can see photos and play videos.
You can also embed photo albums and galleries with the next/previous arrow links. You don’t need a Flickr account to embed photos or videos.
Note: With video, the page/post only displays the image of the video. There will be no play/pause button. By clicking on the video, it will be redirected to the corresponding Flickr page to play.
You can only share those photos and videos which are visible to everyone(public). Some publishers put restrictions by setting privacy.

Embedded image from flickr

Steps to embed Flickr photos or videos to your post or page
- Find your photo or video on Flickr.com, and copy the URL of the photo, album, gallery or video from the browser bar.

- Add Flickr embed block to your post or page

Detailed instructions on adding blocks
- Paste the link into the textbox.

- Click the “Embed” button
If the link can be successfully embedded into the post/page, you will see the preview in your block editor.

If you use a URL that can’t be embedded, the block shows the message “Sorry, this content could not be embedded.” You will have two choices: Try again with a different URL or convert to link.

- Click on the Preview button on the top right corner of the page/post.

Embed Photo Album and Gallery
You can embed a photo album and gallery to your post/page. The page/post will display the first photo of the album or gallery with the next and previous arrow link.

Block Toolbar
The Block Toolbar for the Flickr embed shows six buttons:
- Embed
- Change block type or style
- Drag / Move down
- Change alignment
- Edit URL
- Options.

Transform to:

Group
You can transform a Flickr embed into a Group. This would give you the ability to change the background color around the Flickr embed.

Left: Editor view of a Flickr Embed as a group with Color Settings controls
Right: Flickr embeds with a green background.
Change Alignment

- Align left – Make the Flickr post left aligned
- Align center – Make the Flickr post alignment centered
- Align right – Make the Flickr post-align-right
- Wide width – Increase the width of the post beyond the content size
- Full width – extend the Flickr post to cover the full width of the screen.
Note: “Wide width” and “Full width” alignment needs to be enabled by the Theme of your site.
Edit URL
Via the edit URL, you can change the Flickr Embed URL in the embed block. Overwrite the existing URL and click on the “Embed” Button.

More Options
These controls give you the option to copy, duplicate, and edit your block as HTML.
Read about these and other settings.
Block Settings
Media settings


Via the Media Settings, you can control the behavior of your post embed when viewed from a smaller device, like on a phone screen.
The Toggle switch turns on or off the resize functionality for smaller devices. The default setting is “on” or blue.
“Off:” This embed may not preserve its aspect ratio when the browser is resized. In the off position, the toggle switch is gray.
“On:” This embed will preserve its aspect ratio when the browser is resized. The toggle switch turns blue in the “On” position.
Advanced
The advanced tab lets you add a CSS class to your block, allowing you to write custom CSS and style the block as you see fit.

The advanced section lets you add a CSS class to your block.
Changelog
- Updated 2022-11-25
- Removed redundant content
- Updated 2022-10-28
- Added Video walkthrough
- Updated Screenshots as per WordPress 6.0
- Added Alt text to images
- Added locking functionality
- Updated 2020-08-18
- Added “Move To” and “Copy” section under More Options
- Updated 2020-08-17
- Screenshots as per WordPress 5.5
- Created 2020-06-30
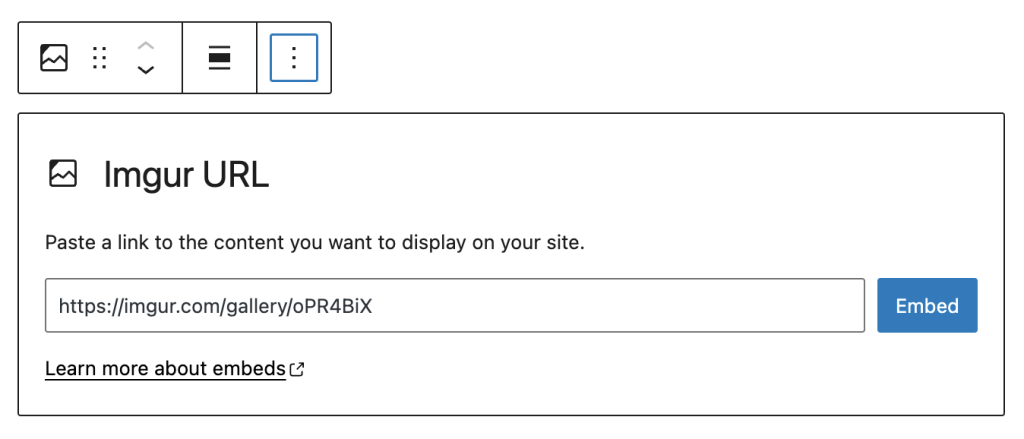
Using the Imgur Embed block you can include an Imgur post into your post/page, so your visitor can stay on your site to view the Imgur post directly, without redirecting to Imgur. Also note that you don’t need an Imgur account to embed an image, GIF or video, although it needs to be public.

Steps to embed an Imgur post in your post or page:
- Head over the Imgur URL of the post you want to embed and copy the URL of the post from the browser bar.

2. Add an Imgur Embed block to your post.

Detailed instructions on adding blocks
3. Paste the Imgur URL from Step 1 in the text box
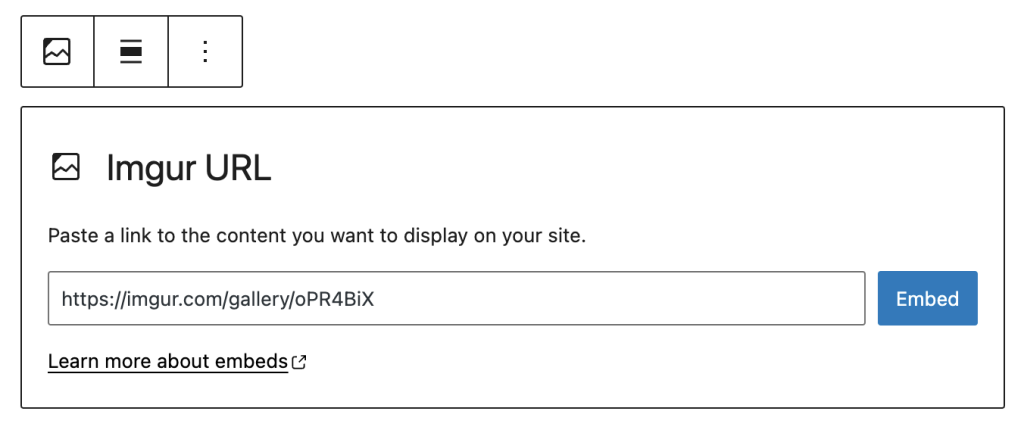
4. Click on the “Embed” Button
If it’s a link that can be successfully embedded you will see a preview in your editor.

If you use a URL that can’t be embedded, the block shows the message “Sorry, this content could not be embedded.” You will have two choices: Try again with a different URL or convert to a link.

5. Click on “Preview” to see how it will look on the front end of your page

Block Toolbar
Each block has its own block-specific controls that allow you to manipulate the block right in the editor. The Block Toolbar for the Imgur embed shows four buttons:
- Transform to
- Block moving tools
- Change alignment
- Edit URL, and
- More Options

Transform to:

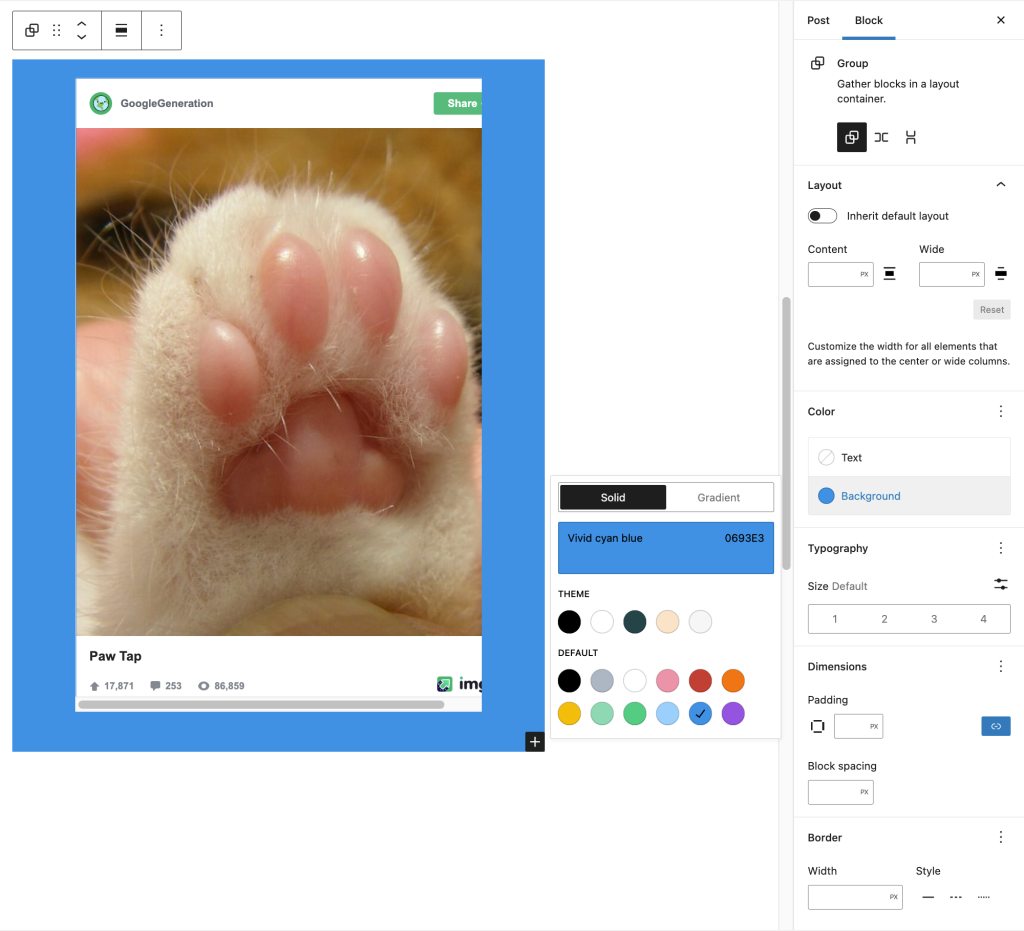
You can transform an Imgur embed block into a Paragraph, Columns or Group block. Changing an Imgur embed block into a Group block would give you the ability to change the background color around the Imgur embed.

Block-moving tools

Use the block-moving tools to move the block up and down the editor. Use the six dots icon to drag and drop the Imgur Embed block and reposition it anywhere on the editor. Alternatively, click on the up and down arrows to move the block up or down the editor.
Get more information about moving a block within the editor.

Change Alignment:
The block toolbar for the Imgur Embed block has options for alignment.
- Align left – Make the block left-aligned.
- Align center – Make the block alignment centered.
- Align right – Make the block right-aligned.
- Wide width – Increase the width of the block beyond the content size.
- Full width – Extend the block to cover the full width of the screen.
The “Wide width” and “Full width” alignment settings must be enabled by your WordPress theme.
Edit URL
Via the edit URL, you can change the Imgur Embed URL in the embed block. Overwrite the existing URL and click on the “Embed” Button
More Options
These controls give you the option to copy, duplicate, and edit your block as HTML.
Read about these and other settings.
Block Settings
Besides the Advanced section, the Imgur embed has only one setting in the “Block Settings” sidebar: Media Settings.
Media settings


Via the Media Settings you can control the behavior of your post embed when viewed from a smaller device, like on a phone screen.
The Toggle switch turns on or off the resize functionality for smaller devices. The default setting is “on” or blue.
“Off:” This embed may not preserve its aspect ratio when the browser is resized. In the off position, the toggle switch is gray.
“On:” This embed will preserve its aspect ratio when the browser is resized. The toggle switch turns blue in the “On” position.
Advanced settings
The advanced tab lets you add a CSS class to your block, allowing you to write custom CSS and style the block as you see fit.

Changelog
- Updated 2022-11-26
- Removed redundant content
- Aligned images for mobile view
- Updated 2020-08-01
- Content and screenshots added for 6.0
- Added ALT tags for the images
- Updated 2020-11-27
- screenshots 5.6
- removed Edit HTML, Add to reusable Blocks and Media sections from More Options and Advanced settings sections.
- Created 2020-09-07
Due to Facebook’s decision to close the oEmbed end point for embedding Instagram links, the block will not work anymore after October 24, 2020. Publishers who want to embed Facebook links into their sites will require a developer account and an appid, and provide an authenication token with their call to the endpoint. Facebook Documentation: create an app
WordPress leadership reached out to Facebook but it seems the policy change is final. Apart from alerting users here and other place, WordPress contributors can’t do anything about it.
The Facebook embed block was removed for the Gutenberg plugin version 9.0 and will be removed from the upcoming WordPress core version in 5.6
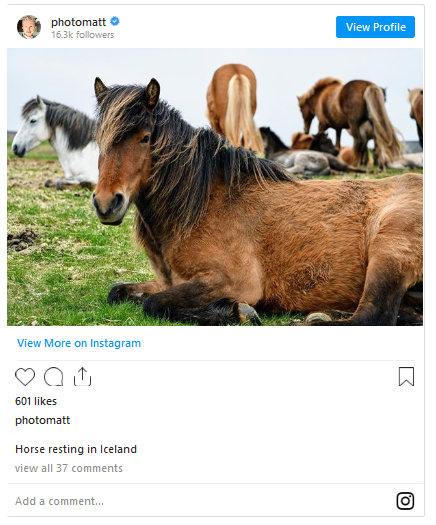
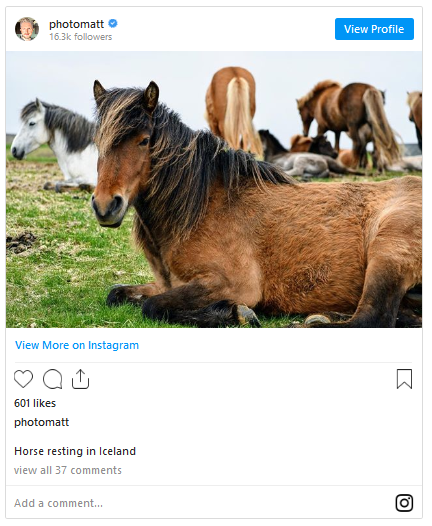
With the Instagram Embed block, you can embed Instagram posts on your posts and pages. You don’t need an Instagram account to be able to use it. You can only embed public posts, though.
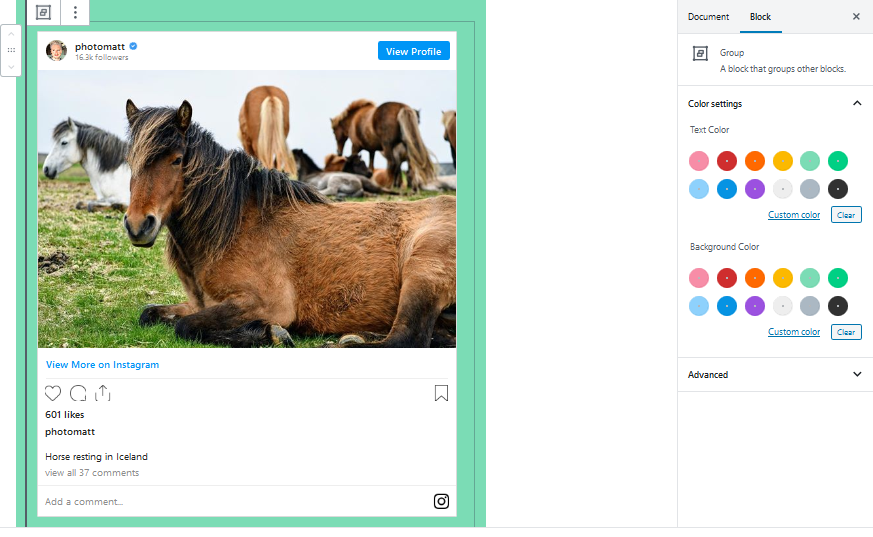
An Example:
Steps to embed an Instagram Post
- Find the URL of the post
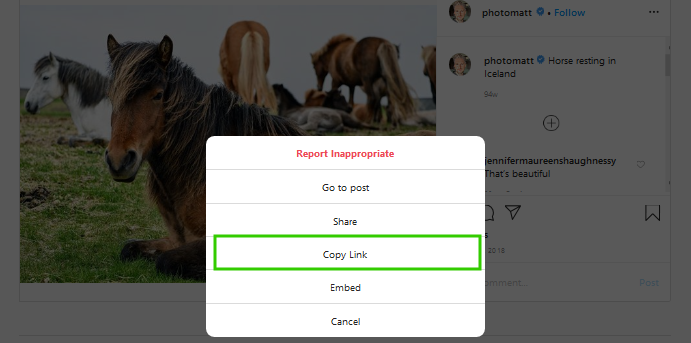
FinNavigate to the Instagram post you want to embed on your page. Copy the link of that post by clicking on it, then on the more options button, and then on the Copy Link. The process is similar for mobile devices.
- Go to your post or page
- Add the Instagram block
- Paste the link into the text box and click the “Embed” button

If the link is embedded successfully, you’ll see a preview in your editor.
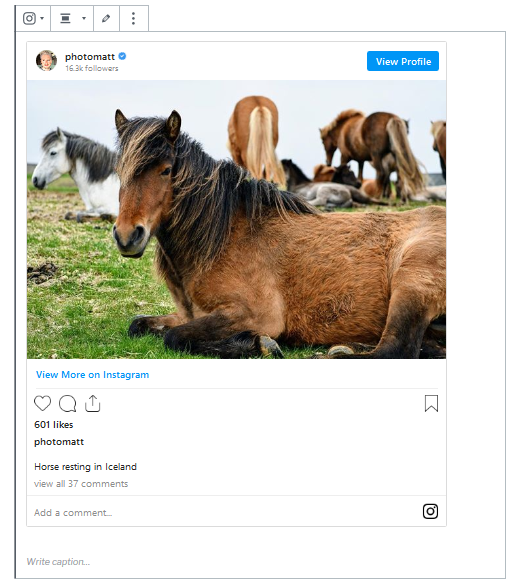
If you’re using a link that cannot be embedded, the block shows a message, “Sorry, this content could not be embedded.”
You will have two choices: Try again with a different URL or convert it to a link.

6. Click on “Preview” to see how it will look on the front-end.
Block Toolbar
Besides the Mover and Drag & Drop Handle, the Block Toolbar for the Instagram embed shows four buttons:
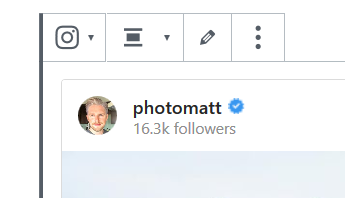
- Transform to
- Change alignment
- Edit URL, and
- More Options.
Transform to:
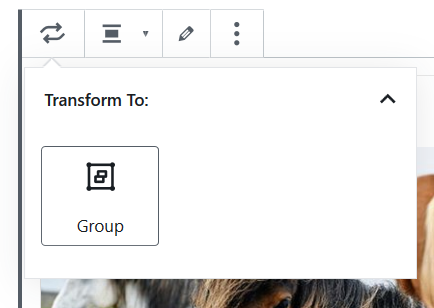
You can transform an Instagram embed to a Group. This would give you the ability to change the background color around the Instagram embed.

Change Alignment
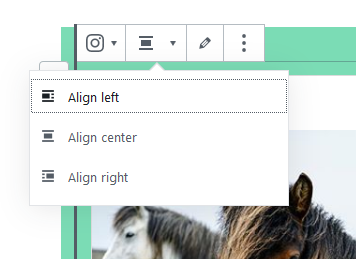
- Align left – Make the Instagram post left aligned
- Align center – Make the Instagram post alignment centered
- Align right – Make the Instagram post align right
Edit URL
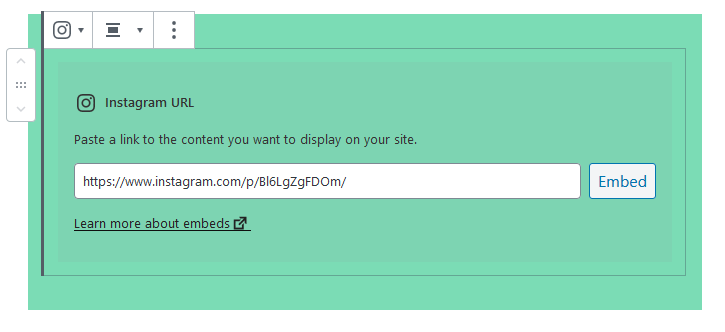
Via the edit URL, you can change the Instagram Embed URL in the embed block. Overwrite the existing URL and click on the “Embed” Button.
More Options:
These controls give you the option to copy, duplicate, and edit your block as HTML.
Read about these and other settings.
Block Settings
Media Settings


Via the Media Settings you can control the behavior of your post embed when viewed from a smaller device, like on a phone screen.
The Toggle switch turns on or off the resize functionality for smaller devices. The default setting is “on” or blue.
“Off:” This embed may not preserve its aspect ratio when the browser is resized. In the off position the toggle switch is gray.
“On:” This embed will preserve its aspect ratio when the browser is resized. The toggle switch turns blue in the “On” position.
Advanced
The advanced tab lets you add a CSS class to your block, allowing you to write custom CSS and style the block as you see fit.

Changelog
- Updated 2022-11-27
- Removed redundant content
- Aligned images for mobile view
- Added alt text to images
- Updated 2020-09-21
- Updated 2020-08-18
- Replaced ‘More Options’ – new screenshot
- Added “Move To” and “Copy” section under More Options
- Created 2020-06-05