Use the Post Modified Date block to display the date the post was last modified. This block is primarily used in a template or nested inside a query loop block.
On the front of your website, this block only shows if you have modified the content after publishing. This means you can combine it with the Post Date block to show the publishing date and the last modified date.
To add a Post Modified Date block, click the Block Inserter icon when editing the page template. Search for the Post Modified Date block. Click on it to add the block to your page template.
You can also type /post mod and hit enter in a new paragraph block to quickly add the Post Modified Date block.

Refer to this article for detailed instructions on adding blocks.
Block Toolbar
To view the block toolbar, click on the block, and the toolbar will be displayed.
Every block comes with unique toolbar icons. These block-specific controls allow you to manipulate the block right in the editor.
The Post Modified Date block shows five buttons in the block toolbar:
- Transform to
- Drag icon
- Move arrows
- Change text alignment
- Change date
- Options

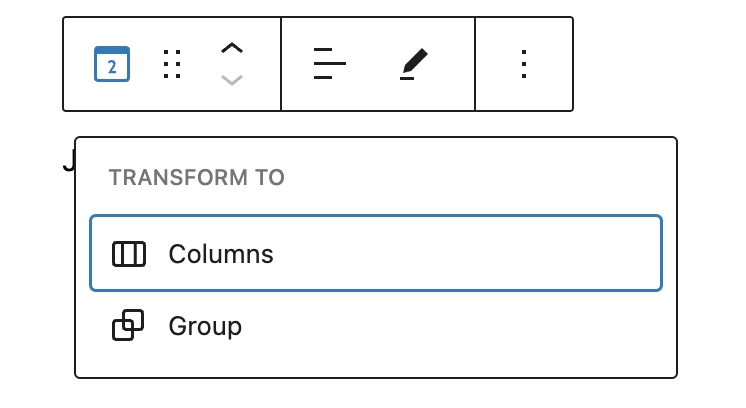
Transform to

Click on the “Transform” button to place the Post Modified Date block in a “Group” block or “Columns” block.
Drag icon
To drag and drop the block to a new location, click and hold the rectangle of dots, then drag to the new location. The blue separator line indicates where the block will be placed. Release the left mouse button when you find the new location to place the block.
Move arrows
The up and down arrow icons can be used to move the block up and down on the page.
Detailed instructions on moving a block within the editor can be found here.
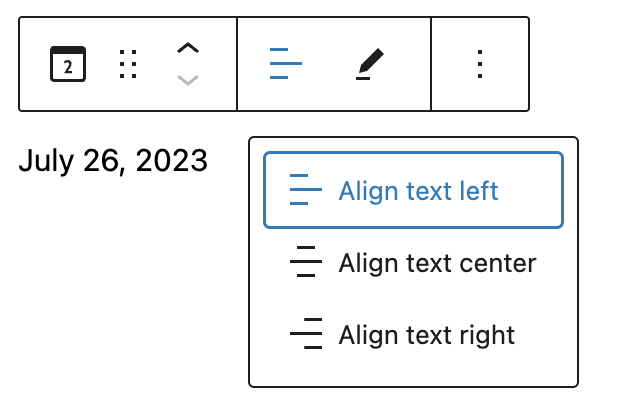
Change text alignment

Click the “Change alignment” button in the Block toolbar to display the alignment drop-down. You can align the block text to the left, make it center-aligned or align it to the right.
Change date
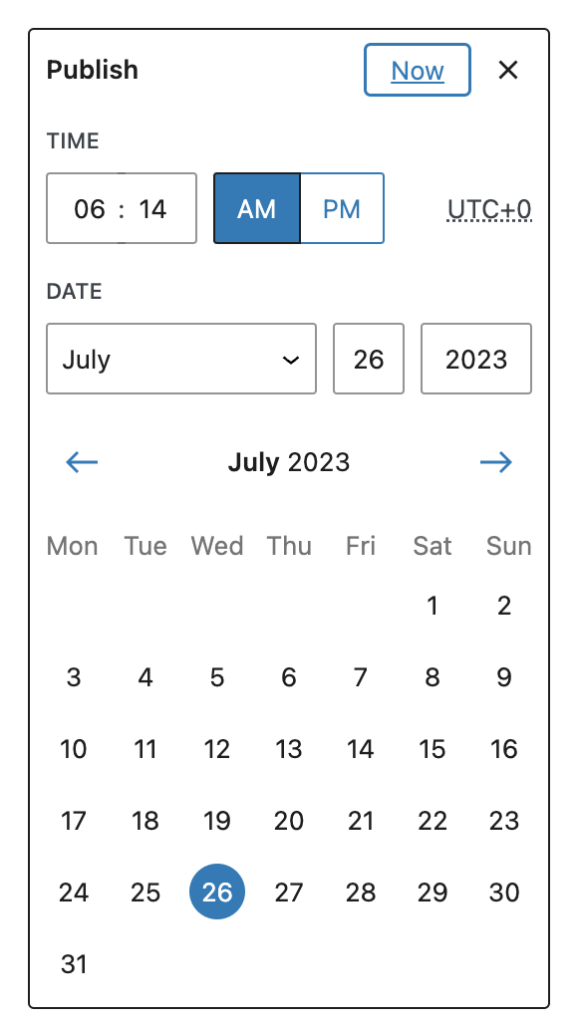
Click the “Change date” button in the Block toolbar to display a modal with date settings.

You can select the publishing date and time through the input fields and options or select the date from the calendar. You can use the arrow buttons to change the month.
Click anywhere outside the modal, press the Escape key, or click on the button with the X to close the modal.

More options
The More Options menu represented by three vertical dots on the far right of the toolbar gives you more features such as the ability to duplicate, remove, or edit your block as HTML.
Read about these and other settings.
Details about More options can be found in this support article.
Block Settings
In addition to the block toolbar, every block has specific options in the editor sidebar.
If you do not see the sidebar, click the ‘settings’ icon next to the Save button.

Format
Toggle “Default format” off to select a different format. Choose from seven different formats, or add a custom format:
- 2022-01-24
- 1/24/2022
- 1/24/2022 11:00 PM
- Jan 24, 2022
- Jan 24, 2022 11:00 PM
- January 24, 2022
- Jan 24
Link to post
Choose whether or not the date should link to the post.
Display the last modified date
This setting is enabled by default for the Post Modified Date block. Turn this off to use the Post date block instead.
Advanced
The “Advanced” tab lets you add CSS class(es) to your block.
Styles
Color
The block provides color settings to change the text color, background color, and link color.
For details, refer to this support article: Color settings overview.
Typography
The block provides typography settings to change the font family, appearance, line height, letter spacing, decoration, letter case, and font size.
For details, refer to this support article: Typography settings overview.
Dimensions
The block provides dimension settings options to add padding and margin.
For details, refer to this support article: Dimension settings overview.
Changelog
- Created 2023-08-08